
 Pin it
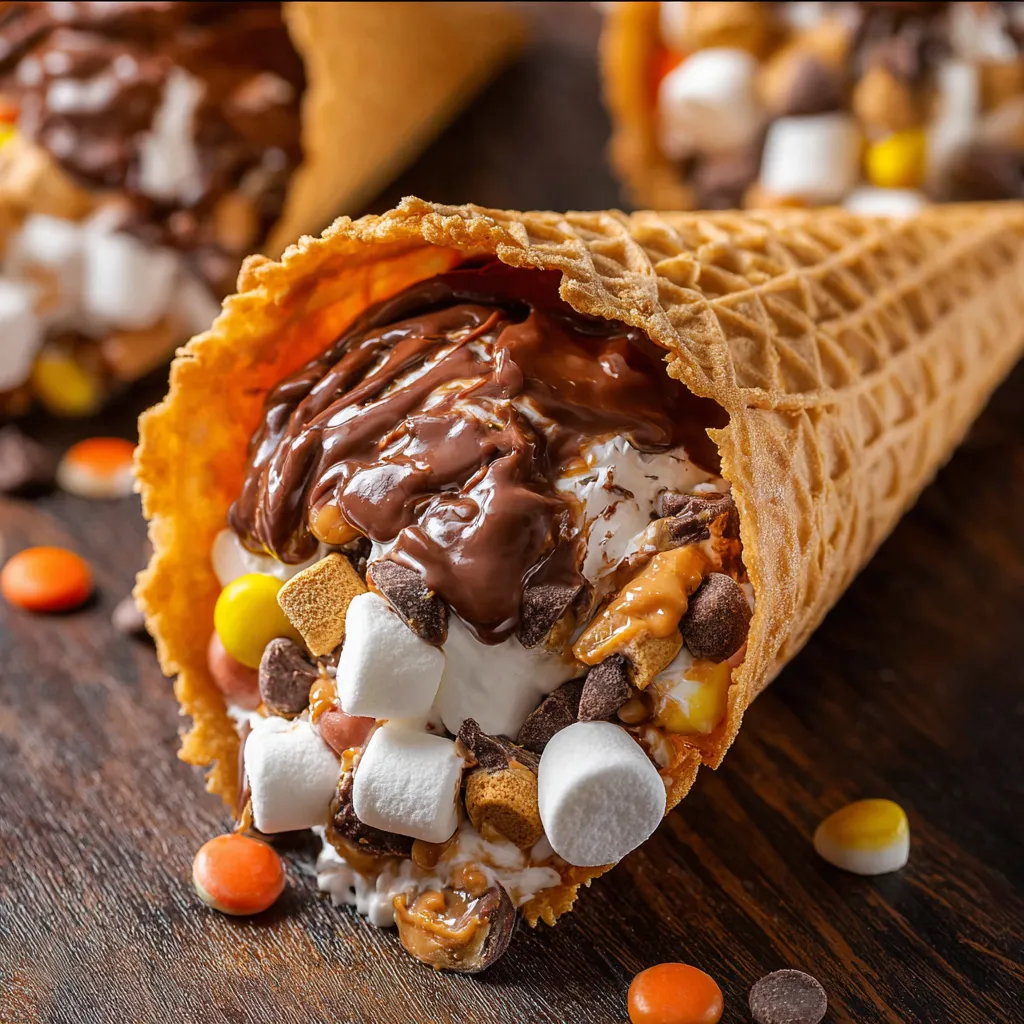
Bring all the fun of summer nights to your table with these Reese’s Campfire Marshmallow Cones The blend of gooey marshmallows melty chocolate and creamy peanut butter candies tucked inside crisp waffle cones is a kid favorite that adults cannot resist This is my go to treat whenever a campfire is involved and it is always the first dessert to disappear at family gatherings
The first time I made these cones everyone around the fire wanted seconds and now our outdoor evenings are not complete without them
Ingredients
- Waffle cones: essential for holding fillings select sturdy cones that do not crack easily
- Mini marshmallows: add gooey sweetness choose fresh fluffy marshmallows for best results
- Chocolate chips: for rich chocolate pockets use semisweet or milk chocolate chips depending on your taste
- Reese’s Mini Peanut Butter Cups: the star ingredient that brings creamy peanut butter flavor opt for fresh soft cups
- Reese’s Pieces: provide crunch and a pop of color look for full bags with no broken candies
- Look for waffle cones without any holes and the freshest candies for the best melted texture
Step-by-Step Instructions
- Prepare the Cones:
- Fill the bottom of each sturdy waffle cone with a layer of mini marshmallows pressing gently to avoid cracks This prevents any chocolate from leaking and forms a gooey base
- Layer the Fillings:
- Add chocolate chips Reese’s Mini Peanut Butter Cups Reese’s Pieces and an extra sprinkle of mini marshmallows Continue layering and pressing gently until the cone is filled to the top This keeps everything packed and prevents uneven melting
- Wrap in Foil:
- Wrap each cone tightly in aluminum foil Start by covering the top to keep fillings in place Then fold the bottom up and seal the sides snugly so nothing leaks while melting
- Campfire or Oven Melting:
- For campfire cooking nestle foil wrapped cones into hot coals or on a grate Turn every couple of minutes and cook 5 to 7 minutes For oven baking preheat to 350 degrees Fahrenheit and bake on a sheet for 10 to 15 minutes Watch closely for the perfect melt
- Unwrap and Enjoy:
- Let cones cool for just a minute or two to avoid burning fingers Carefully unwrap the foil dish up and serve while the fillings are molten and the cone is still crisp

It is always fun to watch everyone’s face as they open their own cone My favorite part is the bite where all the creamy peanut butter and melted chocolate meet for the perfect mouthful It feels like a campfire celebration every time we make these as a family
Storage Tips
If you have leftover cones wrap them back in foil and keep in an airtight container at room temperature for up to two days Reheat wrapped cones for a few minutes in a warm oven to refresh that gooey texture For longer storage freeze the cones and warm up in the oven until heated through
Ingredient Substitutions
Swap chocolate chips with white chocolate or butterscotch chips for a twist If peanut butter candies are unavailable use mini caramel candies M and Ms or chopped candy bars for a fun mix Add sliced bananas or strawberries for a fruity surprise nuts work well too
Serving Suggestions
Let everyone customize their own cone with a topping bar featuring extra candies nuts or even sprinkles These cones are at their best enjoyed around the fire with friends Serve alongside a scoop of vanilla ice cream for an over the top s’mores mashup

Cultural Context
Campfire treats like these cones are a classic American tradition bringing back memories of s’mores but with a creative twist I love how this recipe blends nostalgia with the excitement of trying new combinations making it perfect for summer get togethers and family reunions
Frequently Asked Questions
- → Can I use other candies besides Reese’s?
Absolutely! Try adding chopped caramel, white chocolate, or your favorite fruit-flavored candies for a twist on flavors.
- → Are campfire cones suitable for oven baking?
Yes, simply place wrapped cones in a preheated oven at 350°F and bake for 10-15 minutes until everything is melted and gooey.
- → Can I prepare the cones ahead of time?
Definitely! Prepare and wrap the cones in foil, then refrigerate until you’re ready to bake or toast them.
- → What’s the best way to avoid burning the cones?
Wrap cones tightly in foil and check frequently while toasting over heat. Turn them occasionally for even melting.
- → How can I make these vegan?
Use vegan marshmallows, dairy-free chocolate, and plant-based candies for a delicious vegan version.
- → Can I add fresh fruit or nuts?
Yes! Sliced bananas, berries, or chopped nuts can be layered in for extra flavor and texture.