
 Pin it
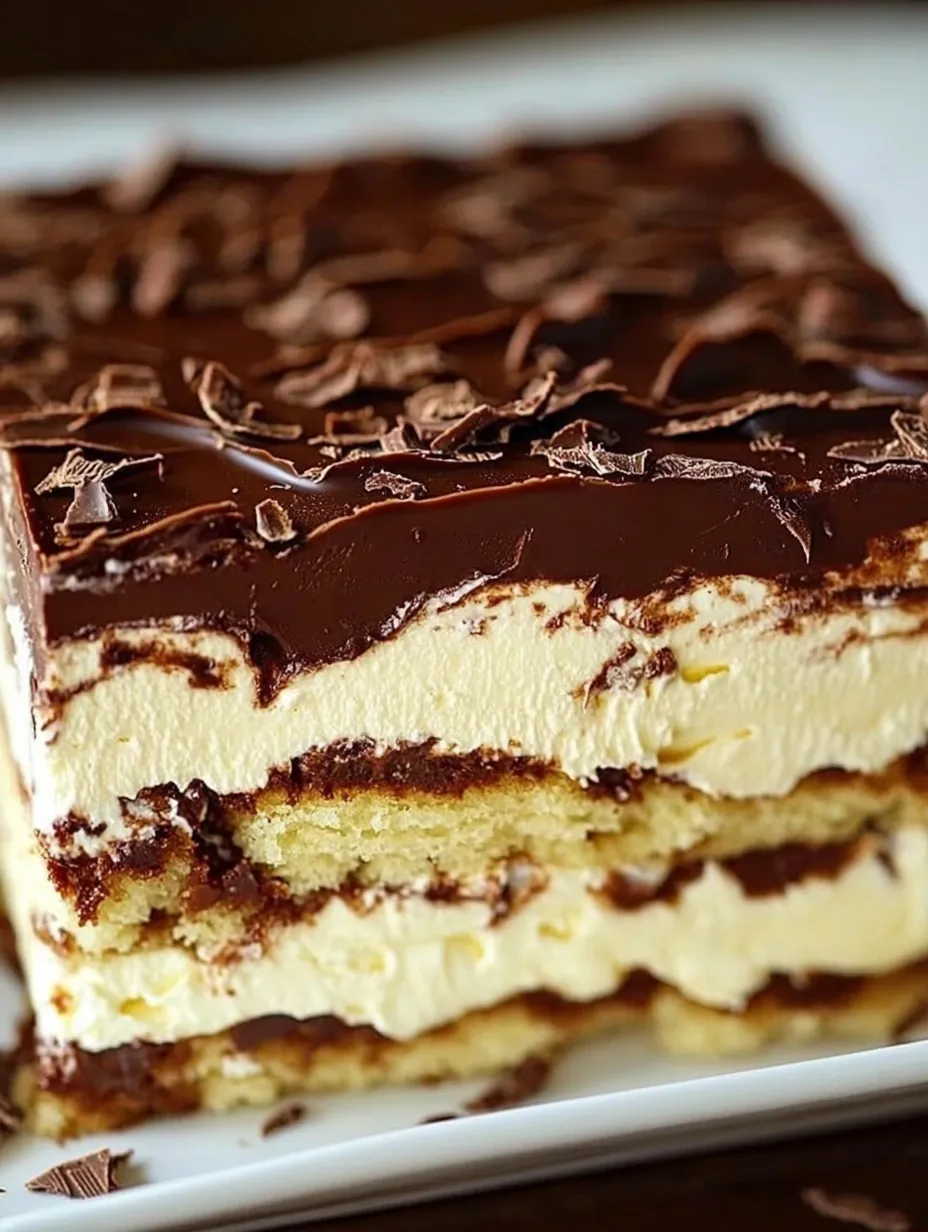
This decadent no-bake chocolate and cream layered dessert has become my signature treat for gatherings where I want to impress without spending hours in the kitchen. The contrast between the silky cream, softened biscuits, and rich chocolate topping creates a dessert that tastes like it came from a fancy patisserie.
I first made this dessert for my daughter's birthday when our oven unexpectedly broke down. What began as a kitchen emergency has now become the most requested treat in our family, earning rave reviews even from my mother-in-law who rarely compliments my cooking!
Ingredients
- Fresh heavy cream: whips up into the perfect cloud-like texture that holds its shape between layers
- Dark chocolate: provides a sophisticated bitter note that balances the sweetness
- Powdered sugar: dissolves seamlessly into the cream without any grittiness
- Vanilla extract: enhances the cream's flavor look for pure extract not artificial flavoring
- Butter: adds glossiness to the chocolate topping ensuring a beautiful shine
- Biscuits or sponge cake: creates the foundation choose crisp biscuits for more texture or sponge for a softer bite
Step-by-Step Instructions
- Prepare the Whipped Cream:
- Chill your mixing bowl and beaters in the freezer for 10 minutes before starting. This helps the cream whip faster and with more volume. Pour the cold heavy cream into the chilled bowl, add the powdered sugar and vanilla extract. Begin whipping on low speed, gradually increasing to medium-high until soft peaks form that hold their shape but still look silky. Be careful not to overwhip or you will have butter.
- Create the Base Layer:
- Select a clear serving dish to showcase the beautiful layers. Arrange the biscuits or sponge cake pieces in a single layer, covering the entire bottom. If using biscuits, place them side by side with minimal gaps. For sponge cake, cut pieces to fit snugly together. This foundation layer will absorb moisture from the cream and soften to the perfect consistency.
- Build Your Layers:
- Spoon one-third of the whipped cream over the biscuit layer and gently spread it with an offset spatula, creating an even layer about half an inch thick. Take care not to press too hard or you will disturb the biscuits underneath. Add another layer of biscuits on top of the cream, pressing ever so slightly to secure them. Continue alternating layers, finishing with a generous layer of cream on top that you smooth perfectly flat to create an ideal surface for the chocolate.
- Create the Chocolate Topping:
- Break the chocolate into small pieces and place in a heatproof bowl with the butter. Melt using either the microwave in 30-second intervals, stirring between each, or over a pot of barely simmering water, ensuring the bowl doesn't touch the water. Stir until completely smooth and glossy. Let it cool for 2-3 minutes until just slightly thickened but still pourable. Pour over the top cream layer in a steady stream, tilting the dish to help it spread evenly across the surface.
- Chill and Set:
- Cover the dessert with plastic wrap, being careful not to let it touch the chocolate surface. Refrigerate for at least 4 hours, though overnight is best as it allows the biscuits to fully soften and the flavors to meld together perfectly. The patience required here is absolutely worth it as the texture transforms completely during this resting period.
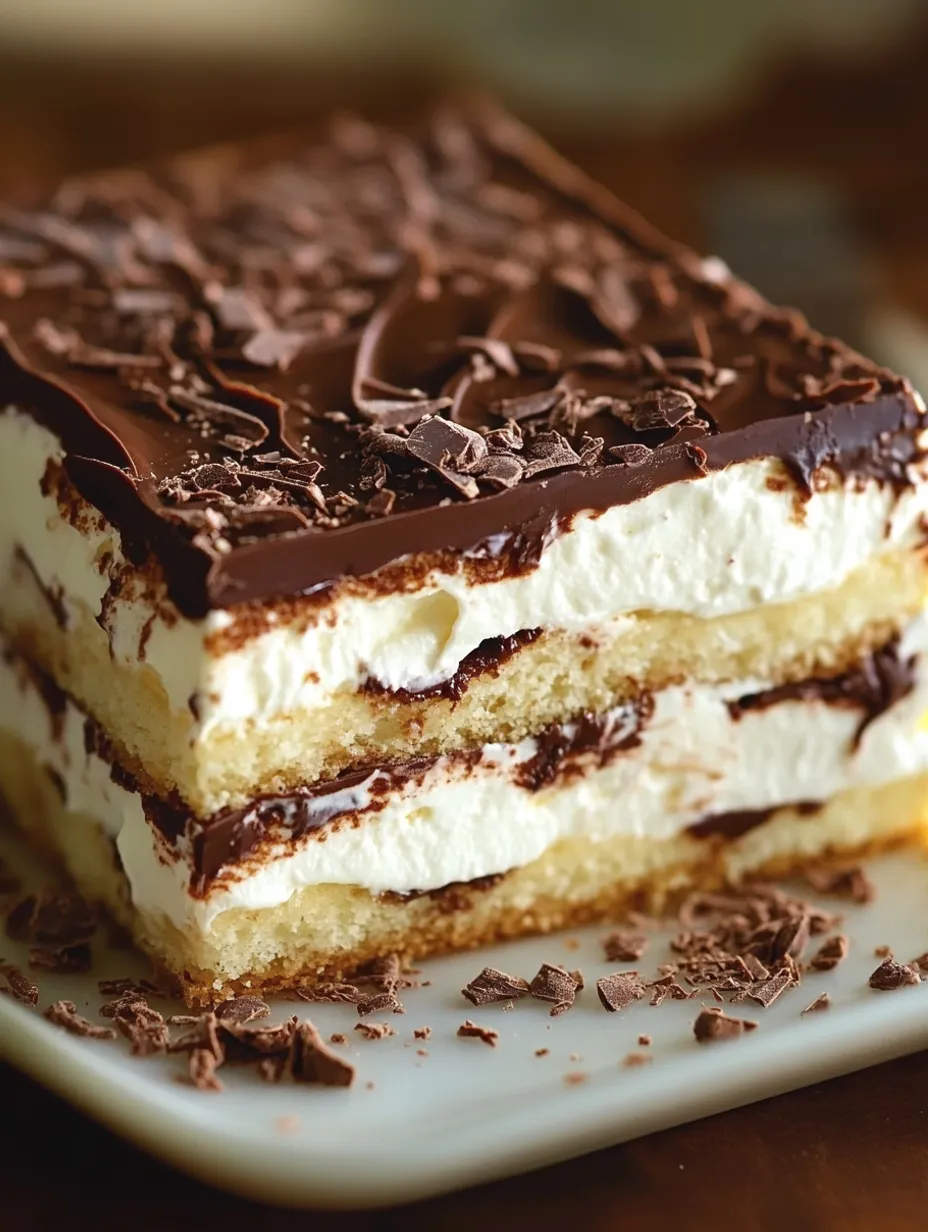
The dark chocolate topping is my favorite part of this recipe. I discovered through much experimentation that adding a tiny pinch of sea salt to the melting chocolate elevates the entire dessert, creating a more complex flavor profile that makes guests wonder about your secret ingredient.
Flavor Variations
Fruit Additions
Transform this classic dessert by adding layers of fresh berries between the cream layers. Strawberries, raspberries, or blueberries not only add a pop of color but also introduce a pleasant tartness that cuts through the richness. For a more tropical version, thinly sliced bananas or diced mangoes work beautifully. The natural juices from the fruit will infuse into the cream, creating additional flavor dimensions throughout the dessert.
Coffee Infusion
For coffee lovers, try soaking the biscuits in a mixture of strong coffee and a splash of liqueur before layering. This creates a tiramisu-inspired variation that adds wonderful depth. Simply brew some espresso or strong coffee, let it cool completely, and quickly dip each biscuit before placing it in the dish. The coffee flavor intensifies during chilling, resulting in a sophisticated dessert perfect for dinner parties.
Nut Embellishments
Incorporating nuts adds wonderful texture contrast to this creamy dessert. Consider sprinkling toasted chopped hazelnuts, almonds, or pistachios between layers or decorating the chocolate top before it sets. The nuts provide a pleasant crunch against the softened biscuits and smooth cream. Toast the nuts beforehand to enhance their flavor and ensure they maintain their crispness even when surrounded by the moist ingredients.
Creative Garnishes
The presentation of this dessert can be elevated with thoughtful garnishes added just before serving. Chocolate curls created by running a vegetable peeler along a chocolate bar make an elegant topping. Alternatively, a light dusting of cocoa powder, cinnamon, or edible gold dust adds sophistication. Fresh mint leaves brighten the appearance and provide a refreshing aromatic element that complements the rich chocolate perfectly.
Frequently Asked Questions
- → What type of biscuits or cake can I use?
You can use any firm biscuits like graham crackers, digestive biscuits, or sponge cake as the base. Choose based on your preferred texture and flavor combination.
- → How can I customize the chocolate topping?
You can use your favorite type of chocolate, whether it's dark, milk, or white. Add a pinch of sea salt or sprinkle crushed nuts on top for extra texture.
- → Can I prepare this dessert in advance?
Yes, this dessert is perfect for preparing ahead. Make it the night before and refrigerate it to allow the flavors to meld together beautifully.
- → What variations can I try for the cream filling?
In addition to vanilla, you can add cocoa powder for a chocolate cream layer or experiment with different flavors like coffee or fruit extracts.
- → How long does it take to set in the refrigerator?
The dessert typically needs at least 4 hours to set properly in the refrigerator. Overnight chilling is even better for optimal texture.