
 Pin it
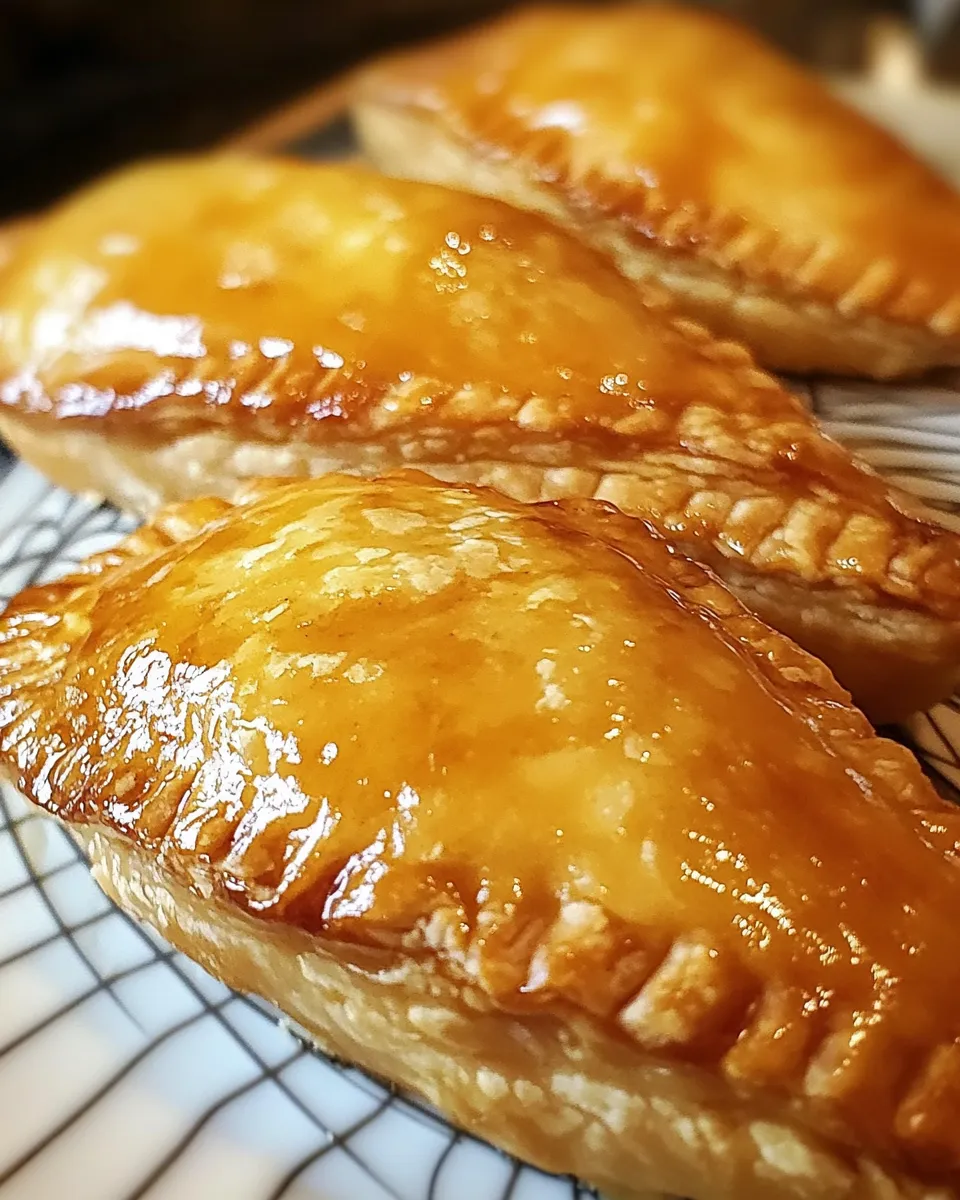
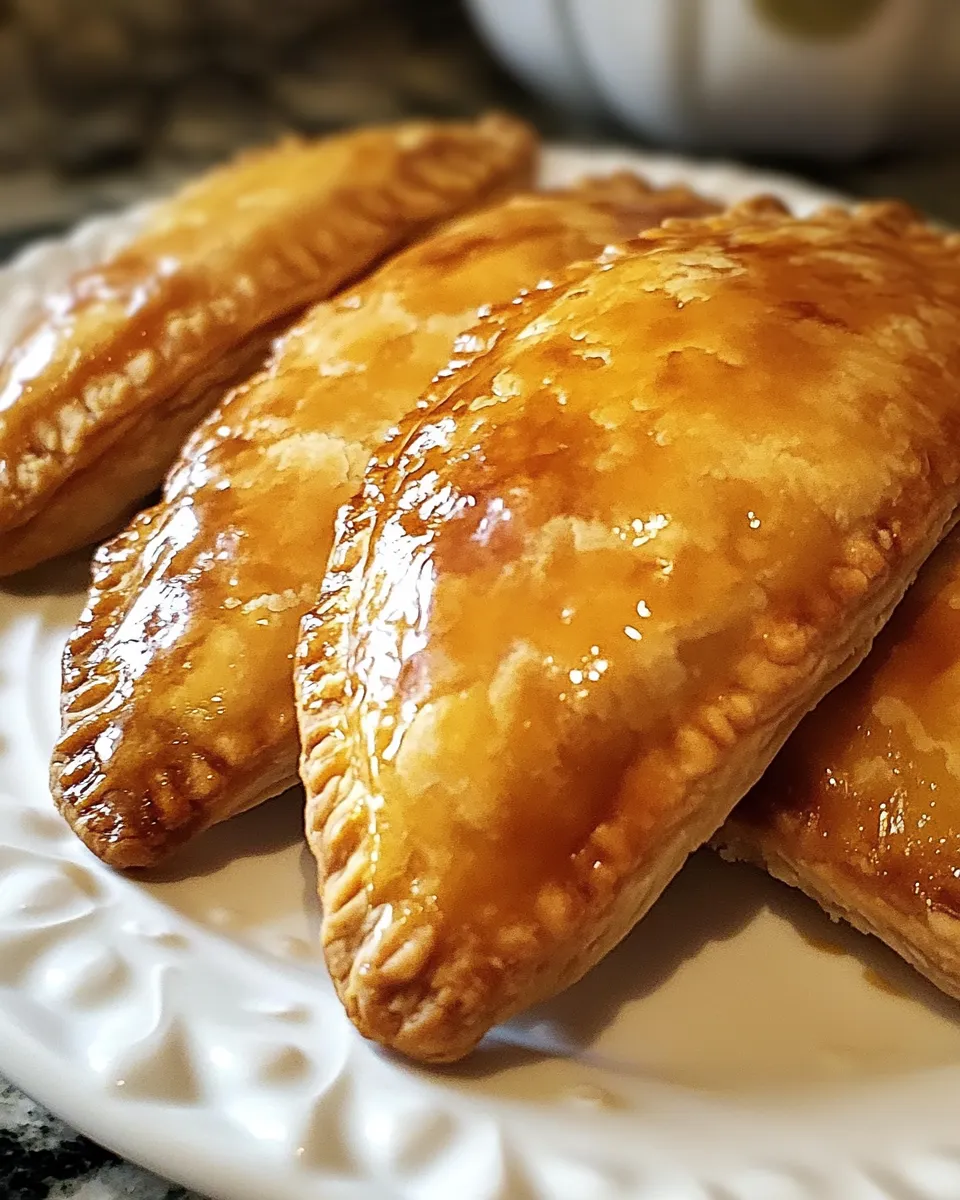
This hearty homemade stuffed cheesecake fried apple pie recipe transforms simple ingredients into a decadent dessert that perfectly balances crispy exteriors with warm, gooey centers. The combination of cinnamon-spiced apples and creamy cheesecake filling creates an irresistible twist on traditional fried pies that will quickly become a family favorite.
I first created these pies during apple picking season when I had bushels of fresh fruit to use. What started as an experiment combining my two favorite desserts has now become our most requested holiday treat, with my children fighting over the last pie every single time.
Ingredients
- Medium apples: preferably Granny Smith or Honeycrisp which offer the perfect balance of tartness and structure to prevent mushy filling
- Unsalted butter: creates richness in the apple filling while allowing you to control the salt content
- Ground cinnamon and nutmeg: these warming spices are essential for classic apple pie flavor use freshly grated nutmeg if possible for more aromatic results
- Cornstarch: creates the perfect thickness in the apple filling without making it gummy
- Cream cheese: use full fat for the creamiest cheesecake filling and allow it to soften completely for smooth blending
- Vanilla extract: adds depth to both the cheesecake filling and glaze look for pure rather than imitation for best flavor
- Premade pie crusts: save significant time without sacrificing quality though homemade dough creates an extra special touch if you have time
Step-by-Step Instructions
- Create Apple Filling:
- Melt butter in a skillet over medium heat until it begins to foam but not brown. Add your peeled and diced apples along with sugar, cinnamon, and nutmeg. Cook for precisely 5-7 minutes, stirring gently every minute or so to ensure even softening without breaking down the apple pieces. The apples should yield to a fork but still maintain their shape. Pour in the cornstarch slurry and continue cooking for 1-2 more minutes, stirring constantly until the mixture thickens enough to coat the back of a spoon. Remove from heat immediately to prevent overcooking and set aside to cool completely to room temperature.
- Mix Cheesecake Filling:
- In a medium bowl, combine softened cream cheese, granulated sugar, and vanilla extract. Beat with an electric mixer on medium speed for 2-3 minutes until completely smooth with no lumps remaining. The filling should be light and fluffy with a spreadable consistency. Scrape down the sides of the bowl halfway through mixing to ensure everything is incorporated evenly. Refrigerate until ready to use if your kitchen is warm.
- Assemble The Pies:
- Lay out your pie dough circles on a lightly floured surface to prevent sticking. Place exactly 1 tablespoon of the cheesecake filling slightly off-center on each circle, then top with 1 tablespoon of the cooled apple filling, leaving at least a half-inch border around the edges. Fold the dough over to create a half-moon shape, pressing out any air pockets as you go. Press edges firmly together with your fingers, then seal by crimping with a fork, making sure there are no openings where filling could escape during frying. Transfer the assembled pies to a parchment-lined baking sheet and refrigerate for 15-20 minutes to firm up the dough and fillings.
- Fry To Perfection:
- Heat vegetable oil in a deep, heavy-bottomed pot to exactly 350°F, using a thermometer for accuracy. Gently lower 2-3 pies into the hot oil using a slotted spoon or spider, being careful not to overcrowd the pot which would lower the oil temperature. Fry for 2-3 minutes per side, watching carefully as they can go from golden to burnt quickly. The perfect pie will have an evenly browned, crispy exterior with no pale or dark spots. Transfer to a paper towel-lined plate to absorb excess oil, allowing them to drain for about 30 seconds on each side.
- Add The Finishing Touch:
- Whisk powdered sugar, milk, and vanilla extract in a small bowl until completely smooth with no lumps. The consistency should be thick enough to coat the back of a spoon but thin enough to drizzle. Either drizzle the glaze over the warm pies using a spoon or fork, or dip the tops of each pie into the glaze for more complete coverage. Allow the glaze to set for 3-5 minutes before serving for the most attractive presentation.
My grandmother taught me the secret to perfectly sealed pies is chilling them before frying, which prevents the filling from leaking and creates that picture-perfect crispy edge. The first time I served these at Thanksgiving, my brother-in-law ate four in one sitting and has requested them at every family gathering since.
Make-Ahead Options
These pies excel as a make-ahead dessert for busy entertaining. You can prepare and assemble the pies completely, then refrigerate them uncooked for up to 24 hours before frying. Alternatively, you can fry them ahead of time, cool completely, and store in the refrigerator for up to 3 days. To restore their crispy texture, reheat them in a 350°F oven for 10 minutes or in an air fryer for 3-4 minutes at 325°F. The gentle reheating warms the filling without burning the crust, giving you results that taste freshly made.
Ingredient Substitutions
This recipe offers plenty of flexibility for dietary needs or pantry limitations. For a lighter version, substitute Neufchâtel cheese for regular cream cheese to reduce fat while maintaining creaminess. Those avoiding dairy can use plant-based butter and cream cheese alternatives that are now widely available. The apple variety can be switched based on season or preference. Pears make an excellent substitute with their similar texture and complementary flavor. For gluten-free guests, use premade gluten-free pie crusts which have improved tremendously in recent years, though they may require slightly more careful handling during assembly.
Serving Suggestions
These hand pies shine brightest when served warm with thoughtful accompaniments. A scoop of vanilla bean ice cream creates a delightful temperature contrast with the warm pie. For extra decadence, drizzle with caramel sauce or add a dollop of lightly sweetened whipped cream. These pies make a stunning dessert board centerpiece alongside fresh berries and mint sprigs for color. During autumn gatherings, serve with spiced apple cider for a themed dessert experience. For brunch applications, skip the glaze and serve with a dollop of Greek yogurt for a less sweet but equally delicious treat.
Frequently Asked Questions
- → Can I use a different type of apple for the filling?
Yes, while Granny Smith and Honeycrisp apples are ideal for their balance of sweetness and tartness, you may use other firm apples like Fuji or Braeburn for a similar result.
- → Can these pies be baked instead of fried?
Absolutely! You can bake them at 375°F (190°C) for 20-25 minutes. Brush them with an egg wash before baking for a golden crust.
- → How can I store leftover pies?
Store any leftover pies in an airtight container in the refrigerator for up to 3 days. Reheat them in the oven or air fryer to maintain crispness.
- → What can I substitute for pre-made pie dough?
If you prefer homemade, use a simple pie dough recipe. Roll it into 4-5 inch circles to assemble the pies as instructed.
- → Can I skip the glaze for a less sweet dessert?
Yes, the pies are delicious on their own. The glaze adds extra sweetness but is entirely optional, depending on your preference.