
 Pin it
The first time I made this raspberry lemon cake was for an impromptu Sunday brunch when my sister dropped by unexpectedly. I was scrambling to put together something special with whatever I had in the kitchen. Spotting a pint of raspberries that were one day away from going bad and a couple of lemons in the fruit bowl, I took a chance on this simple cake. When I pulled it from the oven, the whole kitchen smelled like sunshine. My sister took one bite and immediately asked for the recipe, claiming it was "too good to be that easy." That's exactly why I love it – this cake delivers major flavor and impressive looks with minimal effort, making it perfect for both last-minute gatherings and planned celebrations.
My neighbor Jane, who swears she "can't bake to save her life," has successfully made this cake three times for her book club. If that's not a testament to its foolproof nature, I don't know what is.
Fresh Ingredient Tips
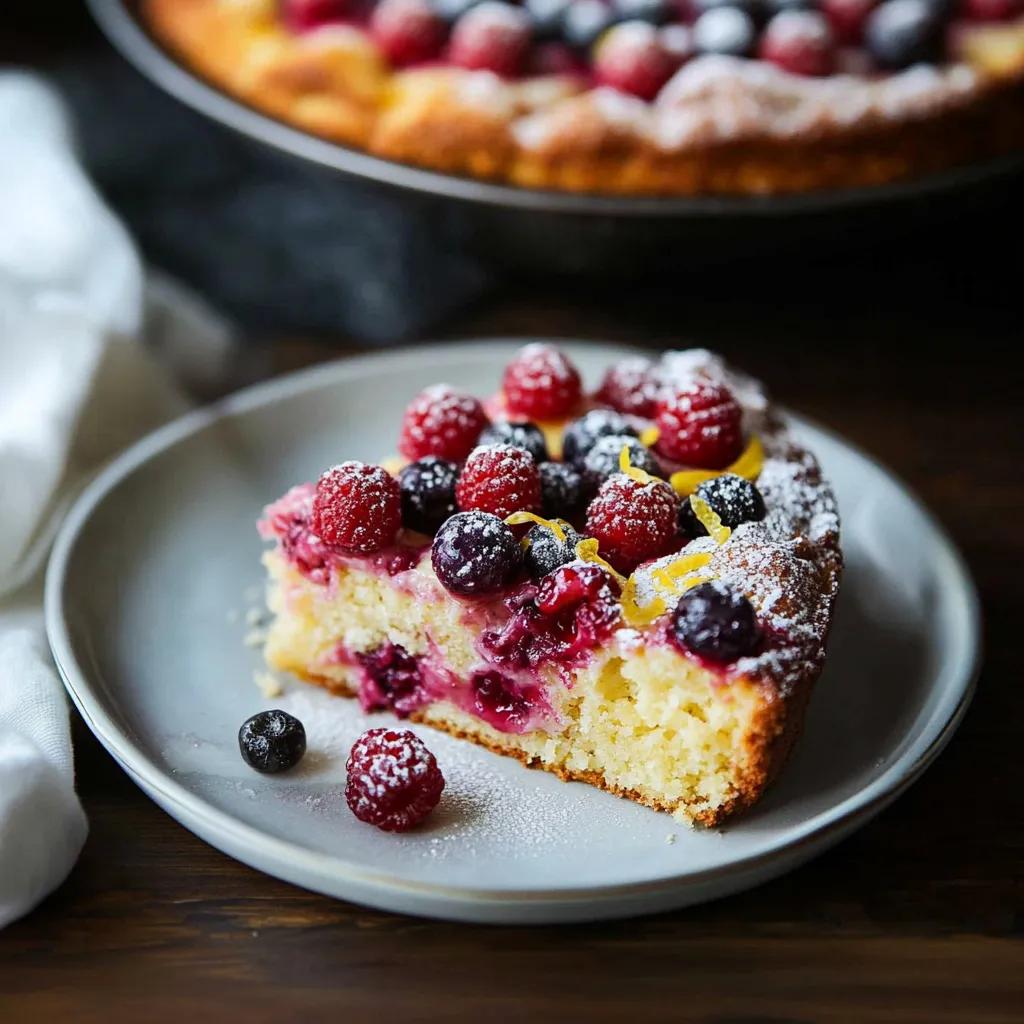
- Raspberries - Choose berries that are bright red, plump, and dry. If they're packed in a container with juice at the bottom, they're already starting to break down. In winter, frozen berries work beautifully too.
- Lemons - Look for heavy fruits with thin, bright yellow skin. These yield the most juice and zest. Roll them firmly on the counter before zesting to release more of the flavorful oils.
- Greek Yogurt - Plain, low-fat works best here. The tanginess balances the sweetness while adding moisture. I've tried with both 0% and 2% fat versions and prefer the slight richness of 2%.
- Butter - Use good quality butter for best flavor. I actually prefer salted butter in this recipe as it enhances all the other flavors, but unsalted works fine too.
- Flour - Regular all-purpose flour creates a tender crumb. For an even lighter texture, you can substitute cake flour, though I rarely find the difference dramatic enough to keep both types on hand.
- Vanilla Extract - Real vanilla makes a noticeable difference in this relatively simple cake. If you've got the good stuff, this is where to use it.
Simple Method
Prep With PurposeStart by getting your pan ready properly. A 9-inch springform pan is ideal because it makes cake removal effortless. Line the bottom with parchment paper (trace around the base for a perfect circle), then grease both the paper and sides. This step might seem fussy but prevents the heartbreak of a stuck cake.
Mix By HandIn a large bowl, whisk sugar, melted butter, and eggs until the mixture becomes noticeably lighter in color and fluffier in texture – about 1-2 minutes of vigorous whisking. This incorporates air for a better rise. Then gently whisk in Greek yogurt and vanilla just until combined. Over-mixing at this stage can toughen the cake.
Flour With FeelingMeasure your flour correctly (fluff, spoon into measuring cup, level off) and whisk it with baking powder in a separate bowl. Add this dry mixture gradually to the wet ingredients, gently folding until just combined. Stop when you no longer see dry flour – a few small lumps are actually good!
Berry StrategyToss about a third of your raspberries with a light dusting of flour before folding them gently into the batter. This flour coating helps suspend them throughout the batter instead of sinking to the bottom. Add the lemon zest at this point too, distributing it evenly.
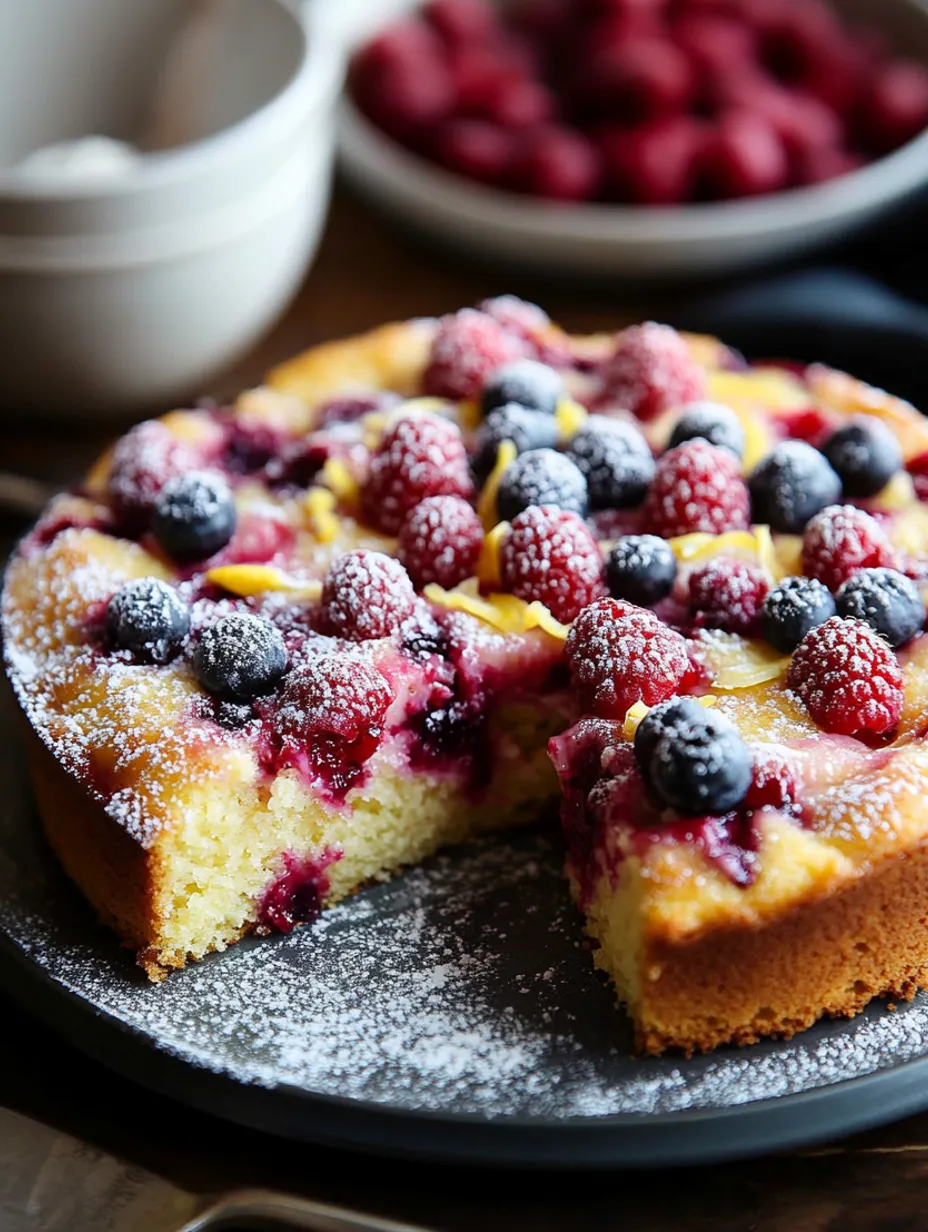
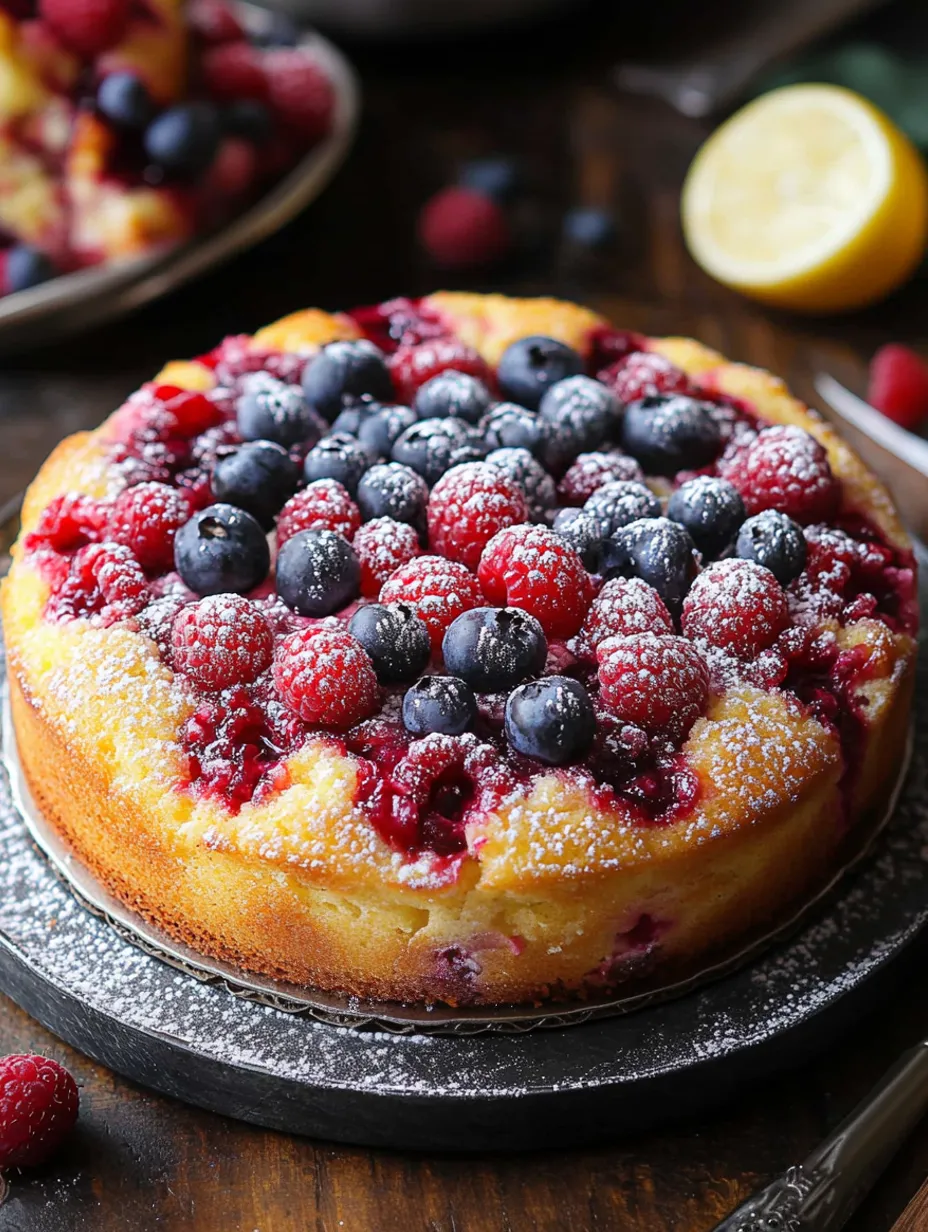
Layer With LovePour the batter into your prepared pan, then artfully arrange another third of your fresh raspberries on top along with a sprinkle of additional lemon zest. This creates a beautiful presentation while infusing more flavor as the cake bakes.
Bake With PatiencePlace the cake in a preheated 350°F oven and resist the urge to open the door frequently. Bake for 45-50 minutes, until a toothpick inserted in the center comes out clean or with just a few moist crumbs. The top should be golden brown and spring back slightly when gently pressed.
Cool CompletelyAllow the cake to cool in the pan for about 30 minutes before releasing the springform. This resting period lets the structure set properly. Once completely cool, dust with powdered sugar and top with remaining fresh raspberries just before serving.
I once accidentally dropped an extra tablespoon of lemon zest into the batter (distracted by a phone call), and it turned out so delicious that I've made it that way ever since. Sometimes the best recipes come from happy accidents!
Serving Ideas
Transform this humble cake into an elegant dessert by serving slices with a dollop of lightly whipped cream and a small pitcher of warm raspberry sauce on the side. The sauce is simple – just heat some additional raspberries with a tablespoon of sugar until they break down into a sauce. This presentation makes people think you spent hours in the kitchen.
Create an impressive brunch centerpiece by arranging the whole cake on a pedestal surrounded by fresh mixed berries and sprigs of mint. Serve with a bowl of Greek yogurt on the side for those who want to add an extra creamy element. I did this for my mother's birthday brunch, and she thought I'd ordered from a bakery.
For a casual summer evening dessert, pair warm slices with good vanilla ice cream and a scattering of toasted sliced almonds. The contrast between the warm, tangy cake and cold, creamy ice cream creates the perfect summer dessert experience. My kids specifically request this combination after barbecues.
Creative Variations
Berry MedleySubstitute half the raspberries with blueberries or blackberries for a mixed berry variation. The different colors create a beautiful presentation, and each berry brings its unique flavor to the mix.
Citrus SwapTry orange or lime zest instead of lemon for a different citrus profile. Orange pairs particularly well with raspberries and adds a sweeter, more mellow citrus note that's perfect for winter months.
Almond AccentAdd ½ teaspoon of almond extract along with the vanilla and sprinkle sliced almonds on top before baking. This subtle nuttiness complements the berries beautifully and adds a pleasing crunch to the top.
Storage Solutions
Counter ConfidenceThis cake stays fresh at room temperature for the first two days, loosely covered with a cake dome or inverted bowl that doesn't touch the surface. The moisture from the berries and yogurt keeps it from drying out.
When storing leftovers in the refrigerator, place slices in an airtight container with pieces of parchment between them to prevent sticking. Let refrigerated slices come to room temperature before serving for the best flavor and texture.
For meal prep or gatherings, you can bake this cake a day ahead. Just wait to add the powdered sugar and final fresh berry topping until serving time for the freshest presentation.
Freezer FriendlyIndividual slices freeze beautifully for up to two months. Wrap each piece tightly in plastic wrap, then place in a freezer bag. Thaw overnight in the refrigerator, then bring to room temperature before serving. I often make a double batch specifically to freeze half for emergency dessert needs.
Chef Tips
Yogurt SubstitutionsOut of Greek yogurt? Sour cream works beautifully as a 1:1 replacement. Even buttermilk can work in a pinch, though the batter will be slightly thinner.
Prevent Sinking BerriesBeyond flouring the berries, don't overmix your batter. A thicker batter helps suspend the fruit throughout the cake.
Edge ProtectionIf your cake is browning too quickly around the edges but still raw in the center, loosely tent with aluminum foil for the remaining bake time.
The summer my oven broke down during a heatwave, I adapted this recipe for a cast-iron skillet on the grill. The slightly smoky flavor and extra-crispy edges turned out so delicious that I now make it this way occasionally even with a working oven! Cooking is all about adaptation and finding joy in the process – and this forgiving, flexible cake recipe proves that delicious doesn't have to mean difficult.
Frequently Asked Questions
- → Can I use frozen raspberries instead of fresh?
- Yes! Frozen raspberries actually work very well in this recipe. They're less likely to break when folded into the batter, which helps maintain distinct berry pieces throughout the cake. There's no need to thaw them before using.
- → How do I properly measure flour for this recipe?
- For best results, first sift or aerate your flour by fluffing it with a whisk. Then spoon it into your measuring cup (rather than dipping the cup into the flour) and level it off with a knife. This prevents adding too much flour, which would make your cake dry.
- → Can I make this cake gluten-free?
- Yes, this recipe works well with Bob's Red Mill Gluten-Free 1-to-1 Baking Flour or King Arthur gluten-free measure-for-measure flour. If the batter seems too thick when using gluten-free flour, add an extra 1/4 cup of Greek yogurt to achieve the right consistency.
- → Can I substitute the Greek yogurt with something else?
- Yes, you can replace the Greek yogurt with plain kefir, regular yogurt, buttermilk, or sour cream. Plain kefir or Greek yogurt are highly recommended as they provide a light texture and pleasant tangy flavor that complements the berries.
- → How should I store leftover cake?
- Store the cake covered at room temperature for up to 2 days, or in the refrigerator for up to 5 days. You can also freeze individual slices wrapped tightly in plastic wrap and then foil for up to 3 months. Thaw at room temperature before serving.