
 Pin it
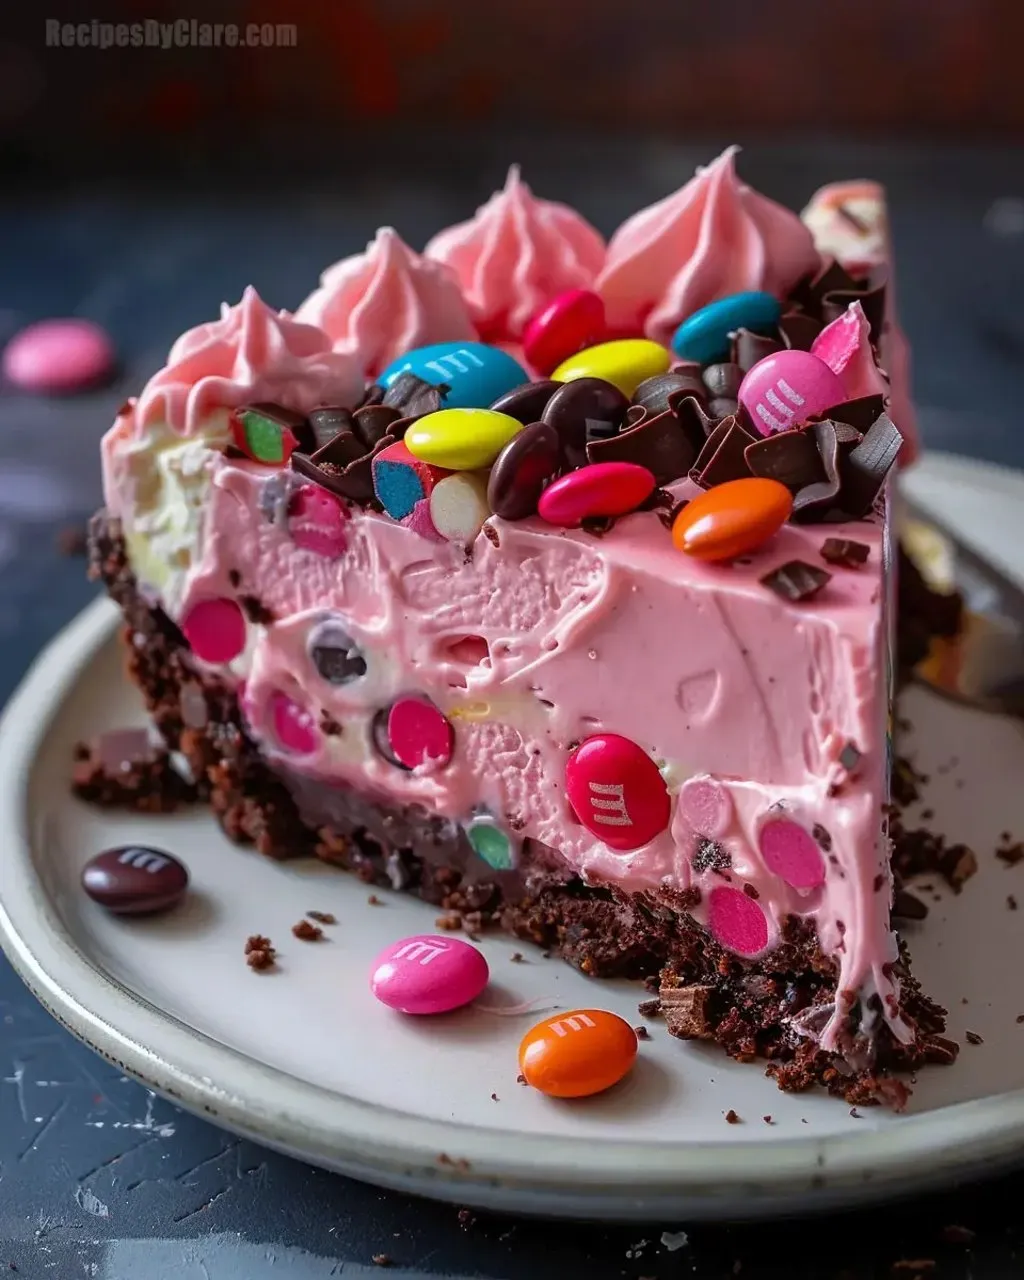
This pink no-bake cheesecake combines the indulgent flavors of Snickers and M&Ms into a showstopping dessert that's perfect for birthdays, Valentine's Day, or anytime you want to impress without turning on the oven. The creamy chocolate-infused filling gets a playful pink makeover while chunks of candy add texture and sweetness throughout.
I first made this for my niece's birthday party, and it was such a hit that it's now requested at nearly every family gathering. The adults love the nostalgic candy flavors just as much as the kids love the fun pink color!
Ingredients
- Graham cracker crumbs or crushed Oreos provide a crunchy foundation that holds up beautifully to the creamy filling
- Cream cheese creates that signature cheesecake tang and velvety texture use full fat for best results
- Melted chocolate adds depth and helps the cheesecake set properly without baking choose quality semisweet for balanced sweetness
- Snickers bars bring caramel, nougat and peanuts for delightful texture contrast throughout the filling
- Pink food coloring transforms this into a festive treat gel colors work best for vibrant hues without thinning the batter
- M&Ms make for a colorful decorative topping that adds a satisfying candy shell crunch
Step-by-Step Instructions
- Prepare the Base
- Crush your graham crackers or Oreos until they reach fine crumb consistency with no large pieces remaining. Mix thoroughly with melted butter until the mixture resembles wet sand. Press firmly into your springform pan using the bottom of a measuring cup to create an even, compact layer. The chilling time is crucial for setting the base properly.
- Melt the Chocolate
- Use gentle heat when melting your chocolate chips, stirring constantly to avoid scorching. The chocolate should be smooth and completely lump-free but not hot when incorporated into the filling. Properly cooled chocolate will incorporate smoothly without creating lumps or streaks.
- Create the Filling Base
- Beat the cream cheese until absolutely smooth before adding other ingredients this prevents lumps later. The powdered sugar incorporates more easily than granulated and helps maintain a silky texture. When adding the melted chocolate, pour in a thin stream while mixing continuously to ensure even distribution.
- Add the Pink Color
- Start with just a small portion of filling when adding food coloring this allows you to control the intensity. Fold the colored portion back into the main mixture gradually until you achieve your desired shade. Remember the color will lighten slightly when you add the whipped cream.
- Incorporate Whipped Cream
- Whip your heavy cream to stiff peaks that hold their shape when the beater is lifted. Use a gentle folding motion with a spatula to maintain the airy texture when combining with the filling. This adds crucial lightness to the final texture.
- Assemble and Chill
- Pour the filling onto the prepared crust in one motion, then use an offset spatula to smooth the top with sweeping motions. The minimum 4hour chilling time is essential for proper setting overnight is even better for a perfectly firm slice.
- Decorate and Serve
- Run a thin knife around the edge of the pan before releasing the springform clasp. Add your toppings just before serving for the freshest presentation. Slice with a knife dipped in hot water and wiped clean between cuts for pristine servings.
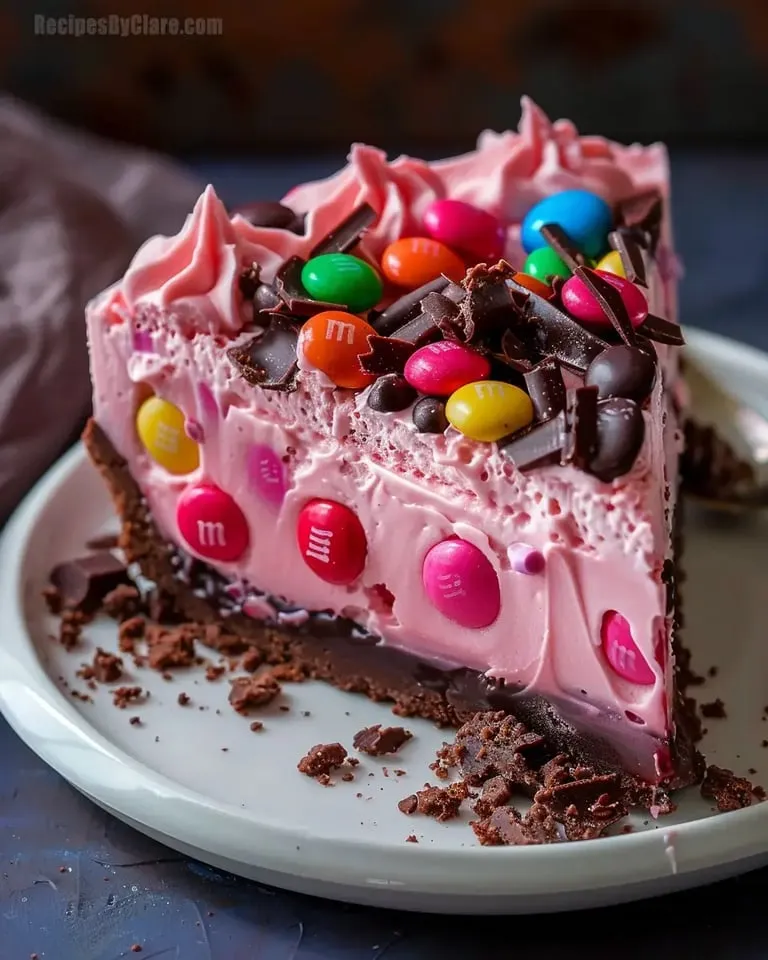
The melted chocolate is truly my secret weapon in this recipe. While many no-bake cheesecakes rely solely on refrigeration to set, the chocolate adds structure while enhancing the flavor. I discovered this technique after making a traditional cheesecake that collapsed when served – never again!
Make-Ahead and Storage
This cheesecake actually improves with time as the flavors meld together. You can prepare it up to two days before serving—just wait to add the final decorative toppings until shortly before serving. Store leftovers covered in the refrigerator for up to 5 days. For longer storage, you can freeze individual slices wrapped tightly in plastic wrap and placed in freezer bags. Thaw overnight in the refrigerator for the best texture restoration.
Flavor Variations
While this pink version is visually stunning, you can easily adapt this recipe for different occasions. Try mint green coloring with Mint M&Ms for a holiday version, or orange with Reese's Pieces for Halloween. For a more sophisticated adult dessert, omit the food coloring and add 2 tablespoons of coffee liqueur to the filling while reducing the vanilla slightly. The versatile base recipe works beautifully with nearly any candy mix-ins.
Serving Suggestions
This showstopper dessert deserves a special presentation. Serve on a cake stand with fresh berries scattered around the base for an elegant contrast to the pink filling. For birthday celebrations, add a ring of candles around the edge rather than trying to insert them into the soft filling. Pair with coffee or milk for casual gatherings, or champagne for adult celebrations—the slight acidity cuts through the richness perfectly.
Troubleshooting Tips
If your filling seems too loose after mixing, chill it for 30 minutes before pouring onto the crust. This helps prevent the filling from seeping under the crust layer. Should your chocolate seize or become grainy when melting, add a teaspoon of vegetable oil and stir until smooth. If your cheesecake doesn't set properly after the recommended chilling time, it likely needs more time in the refrigerator—different refrigerators vary in temperature.
Frequently Asked Questions
- → Can I use a different type of base?
Yes, you can substitute graham crackers or Oreos with digestive biscuits, vanilla wafers, or any crushed cookies you prefer.
- → How do I ensure the filling is smooth?
Ensure the cream cheese is softened and beat it well with the powdered sugar before adding other ingredients to avoid lumps.
- → Can I skip the food coloring?
Absolutely! The food coloring is optional. You can enjoy this dessert without the pink hue, and it will still taste delicious.
- → What can I use instead of Snickers?
You can replace Snickers with other chocolate bars, like Milky Way or Twix, or use chopped nuts and caramel for a similar texture and flavor.
- → How long does the cheesecake need to chill?
The cheesecake should chill for at least 4 hours, but overnight chilling is ideal for the best texture and flavor.
- → Can I make this dessert ahead of time?
Yes, this dessert can be made 1-2 days in advance and stored in the refrigerator until you're ready to serve.