
 Pin it
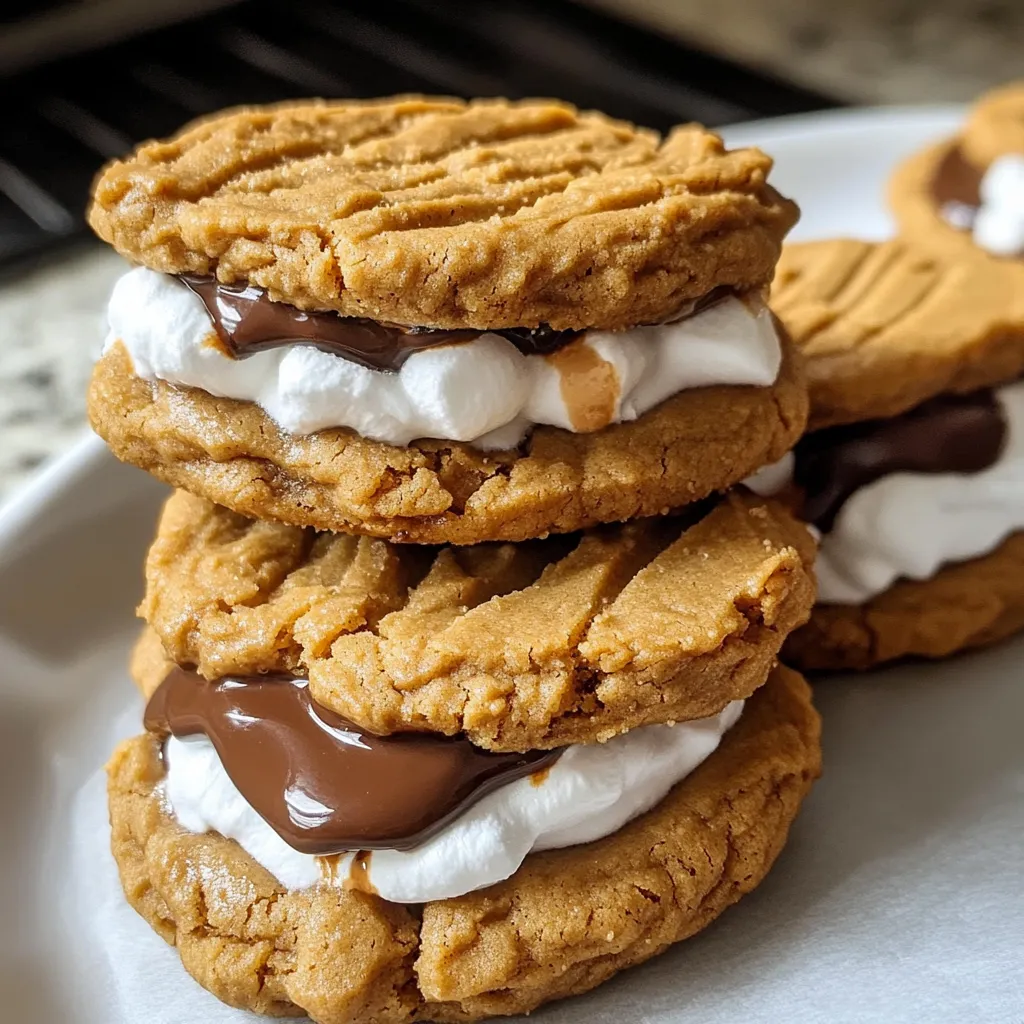
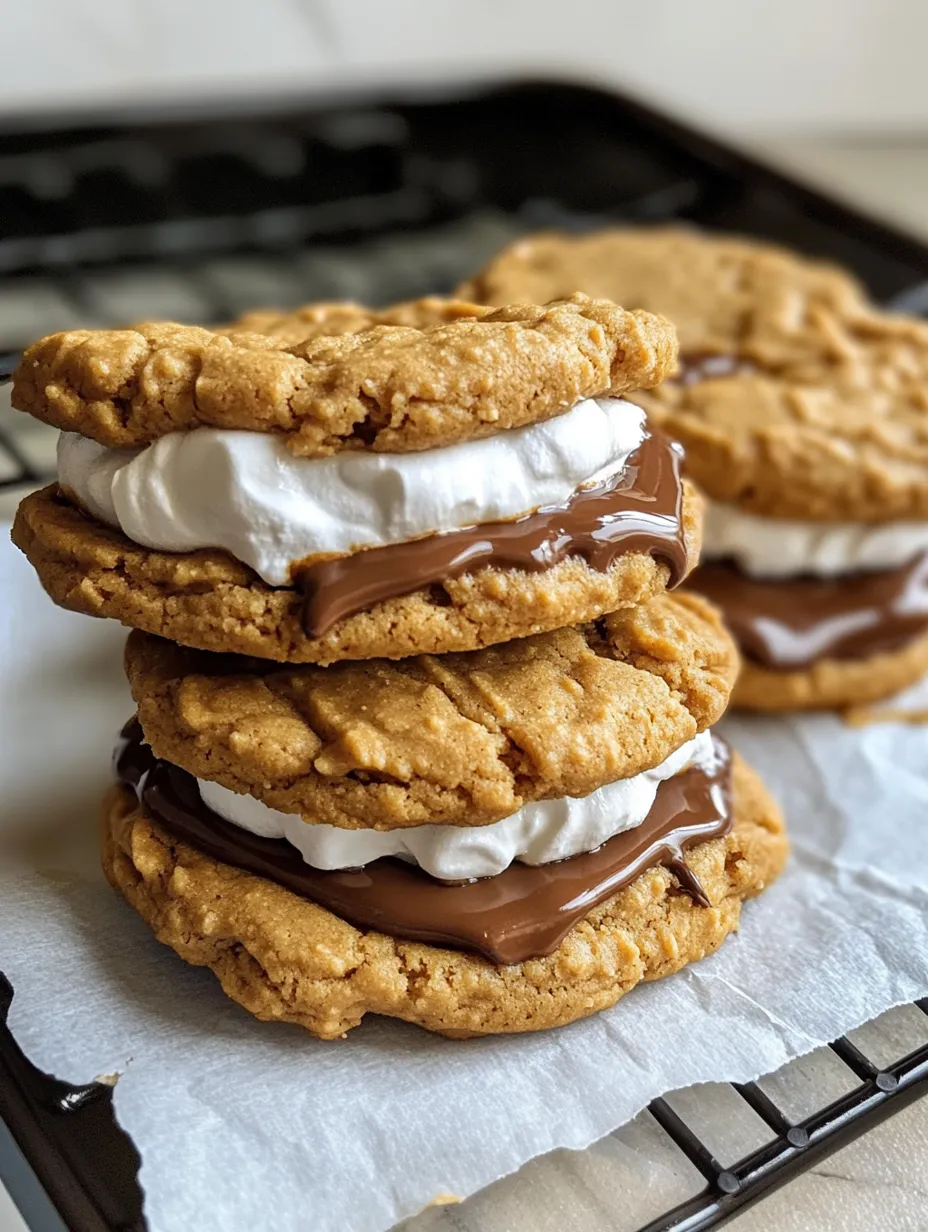
This hearty peanut butter s'mores sandwich cookie recipe combines all the nostalgic flavors of classic campfire s'mores with the comforting taste of homemade peanut butter cookies. Each sandwich delivers that perfect combination of sweet, salty, and chocolatey goodness that's impossible to resist.
I created these cookies for my daughter's summer birthday party when rain ruined our backyard s'mores plans. They were such a hit that they've become our most requested treat for gatherings any time of year.
Ingredients
- Creamy peanut butter: choose a commercial brand like Jif or Skippy for consistent results in the cookie texture
- Unsalted butter: softened to room temperature for proper creaming with sugars
- Granulated sugar: provides sweetness and helps create crisp edges
- Light brown sugar: adds moisture and a subtle caramel note
- Large egg: acts as a binder for the cookie dough
- Vanilla extract: enhances all the flavors in the cookie
- All purpose flour: provides structure to the cookies
- Baking powder: gives a slight rise to keep cookies tender
- Kosher salt: balances the sweetness and enhances peanut flavor
- Marshmallow fluff: creates that gooey s'mores texture without melting like regular marshmallows
- Milk chocolate chips: melted for that authentic s'mores experience
Step-by-Step Instructions
- Prepare Your Equipment:
- Preheat your oven to 350°F and line baking sheets with parchment paper. This temperature creates the perfect balance between crisp edges and soft centers for these peanut butter cookies.
- Create The Cookie Base:
- Cream together the peanut butter, butter, and both sugars until extremely light and fluffy. This process should take a full 2 minutes using an electric mixer. The mixture should look noticeably paler and increased in volume when properly creamed.
- Add Wet Ingredients:
- Incorporate the egg and vanilla extract completely. The mixture should be smooth with no streaks of egg visible. Scrape down the sides of the bowl thoroughly to ensure even mixing.
- Combine Dry Ingredients:
- Whisk together the flour, baking powder, and salt in a separate bowl. This ensures even distribution of the leavening agent and salt throughout the dough for consistent baking.
- Form The Dough:
- Gradually add the dry ingredients to the wet mixture, mixing until just combined. Avoid overmixing which can develop gluten and make cookies tough. The dough should be soft but not sticky.
- Shape And Mark Cookies:
- Use a tablespoon measure to portion dough onto lined baking sheets, leaving two inches between each. Press each cookie with the tines of a fork in a crisscross pattern. Apply gentle pressure to flatten slightly without compressing the dough too much.
- Bake To Perfection:
- Bake for 10 to 12 minutes until the edges turn golden but the centers still look slightly soft. The cookies will continue to firm up as they cool. Watch carefully during the last minute to prevent overbaking.
- Cool Completely:
- Allow cookies to rest on the baking sheet for 5 minutes before transferring to a wire rack. This cooling period is crucial for the cookies to set properly before assembly.
- Assemble The Sandwiches:
- Once cooled, spread marshmallow fluff generously on half the cookies. Warm the peanut butter slightly to achieve a drizzling consistency and zigzag over the fluff. Melt chocolate chips carefully in short microwave bursts and drizzle over the filling before topping with a second cookie.
- Set The Sandwiches:
- Allow the assembled cookies to rest for 10 to 15 minutes before serving. This gives the filling components time to slightly firm up for easier eating.
I always warm my peanut butter in the microwave for about 15 seconds before drizzling, which creates the perfect consistency. The first time I made these, I tried to use cold peanut butter and it was nearly impossible to spread nicely. That small step makes assembly so much more enjoyable.
Storage Tips
These sandwich cookies will stay fresh for up to 3 days when stored in an airtight container at room temperature. For longer storage, place them in a single layer with parchment paper between layers to prevent sticking. If your kitchen is particularly warm, store in the refrigerator to prevent the chocolate and marshmallow fluff from becoming too soft.
Ingredient Substitutions
If you have dietary restrictions or preference variations, this recipe has several flexible elements. For gluten free cookies, substitute the all purpose flour with a 1 to 1 gluten free baking flour blend. Almond butter can replace peanut butter for those with peanut allergies. Dark chocolate chips can be used instead of milk chocolate for a less sweet version with deeper chocolate flavor.
Serving Suggestions
These sandwich cookies make a wonderful dessert served alongside a scoop of vanilla ice cream for an over the top treat. For a fun presentation at parties, stack them in alternating directions on a tiered serving plate with a small pitcher of milk nearby. They also pack well in lunch boxes or picnic baskets if you let the chocolate set completely first.
The History Behind The Treat
Traditional s'mores date back to the early 20th century when Girl Scout troops published the first known recipe for this campfire treat. This sandwich cookie version maintains all those beloved flavors while making them accessible year round without fire. The addition of peanut butter honors another American classic flavor pairing that emerged in the mid 1900s when peanut butter and chocolate combinations became wildly popular.

Frequently Asked Questions
- → Can I use chunky peanut butter instead of creamy?
Yes, but the texture of the cookies may vary slightly, and they may not be as smooth to pair with the filling.
- → How should I store these sandwich cookies?
Store them in an airtight container at room temperature for up to 3 days, or refrigerate for up to a week for firmer chocolate layers.
- → Can I substitute marshmallow fluff with regular marshmallows?
Marshmallow fluff is recommended for its spreadable texture, but you can melt regular marshmallows as a substitute for a similar effect.
- → How can I make the cookies gluten-free?
Use a gluten-free all-purpose flour blend to replace the regular flour. Make sure all other ingredients are certified gluten-free.
- → Can I freeze these cookies for later?
Yes, you can freeze the assembled cookies in an airtight container. Allow them to thaw at room temperature before serving.