
 Pin it
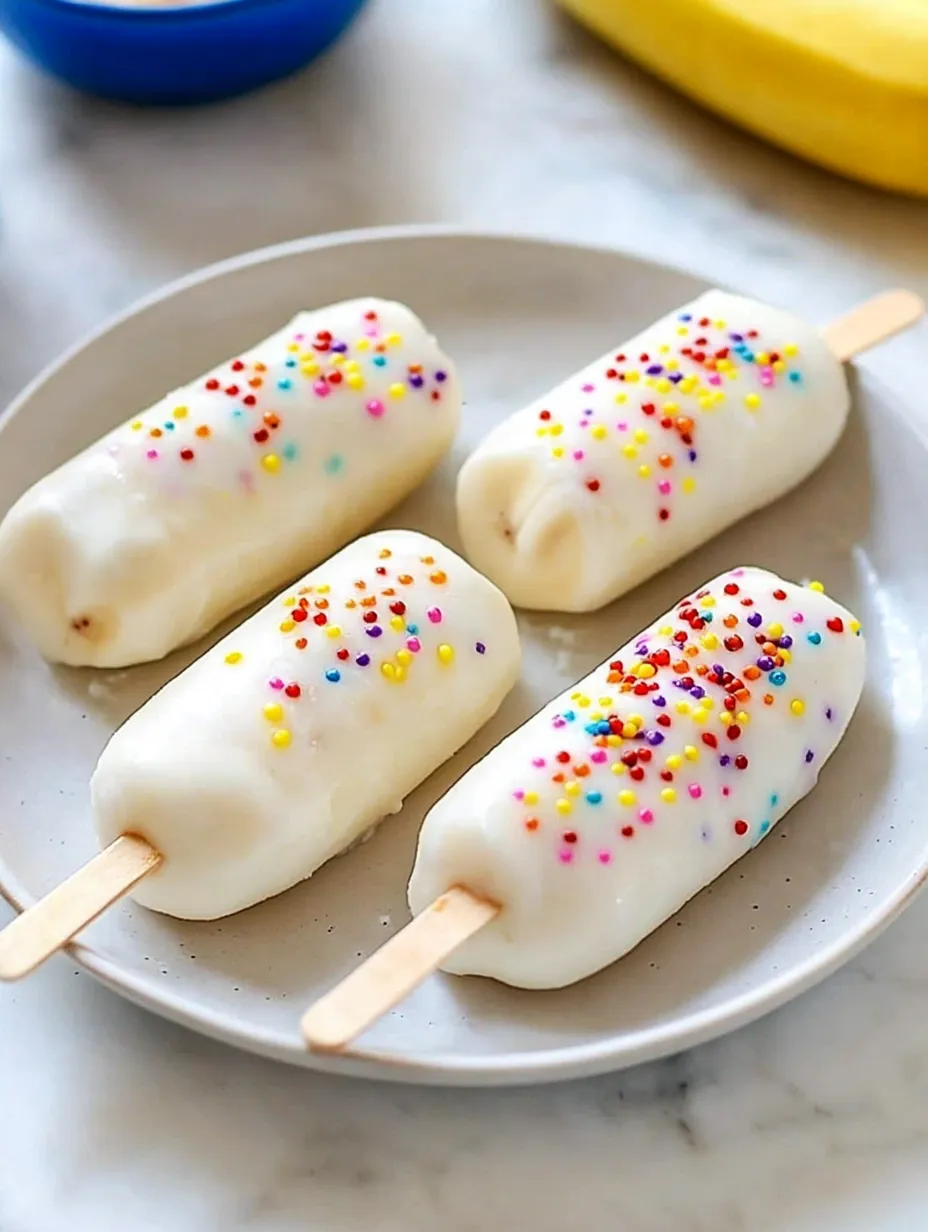
This frozen banana treat transforms ordinary fruit into a delightful dessert that satisfies sweet cravings while keeping things nutritious. The combination of creamy yogurt coating and customizable toppings creates a refreshing summer treat that feels indulgent but remains wholesome.
I started making these during a particularly scorching summer when my niece and nephew were visiting. What began as a simple way to use up overripe bananas has become their most requested activity whenever they come over, turning kitchen time into memorable bonding moments.
Ingredients
- Bananas: Choose slightly ripe but still firm bananas they should have light spotting but not be overly soft for the best texture when frozen
- Vanilla yogurt: Use Greek yogurt for extra protein and a thicker coating that adheres better to the bananas
- Colorful sprinkles: These add a festive touch kids love, but you can substitute with chopped nuts, mini chocolate chips, or shredded coconut for variety
- Popsicle sticks: Look for food-grade wooden sticks available at most craft stores or online
Step-by-Step Instructions
- Prepare the bananas:
- Peel each banana and cut in half widthwise to create 6 equal pieces. Insert a popsicle stick into the cut end of each banana half, pushing it about halfway through to ensure it stays secure during freezing. If your bananas are very ripe, place them in the freezer for 10 minutes before inserting the sticks to prevent splitting.
- Create your dipping station:
- Pour the vanilla yogurt into a bowl deep enough for dipping. The bowl should be narrow enough to allow sufficient depth for coating the entire banana. For best results, use yogurt straight from the refrigerator as the cold temperature helps it adhere better to the bananas.
- Coat with yogurt:
- Dip each banana into the yogurt, rotating to coat all sides evenly. Use a spoon to help cover any missed spots, paying special attention to the area where the stick meets the fruit. Allow excess yogurt to drip back into the bowl for a few seconds before moving to the next step. Work quickly as the cold banana will cause the yogurt to begin setting.
- Add toppings:
- While the yogurt layer is still wet, roll or sprinkle your chosen toppings over the bananas. Place a sheet of wax paper under your work area to catch fallen toppings and make cleanup easier. For even coverage, gently press the toppings into the yogurt with clean fingertips.
- Freeze until solid:
- Arrange the coated bananas on a parchment-lined baking sheet, ensuring they don't touch each other. Place the entire sheet in the freezer, keeping it level to prevent dripping. Freeze for at least 2 hours until the yogurt coating is completely solid. For fully frozen bananas, allow 3-4 hours of freezing time.
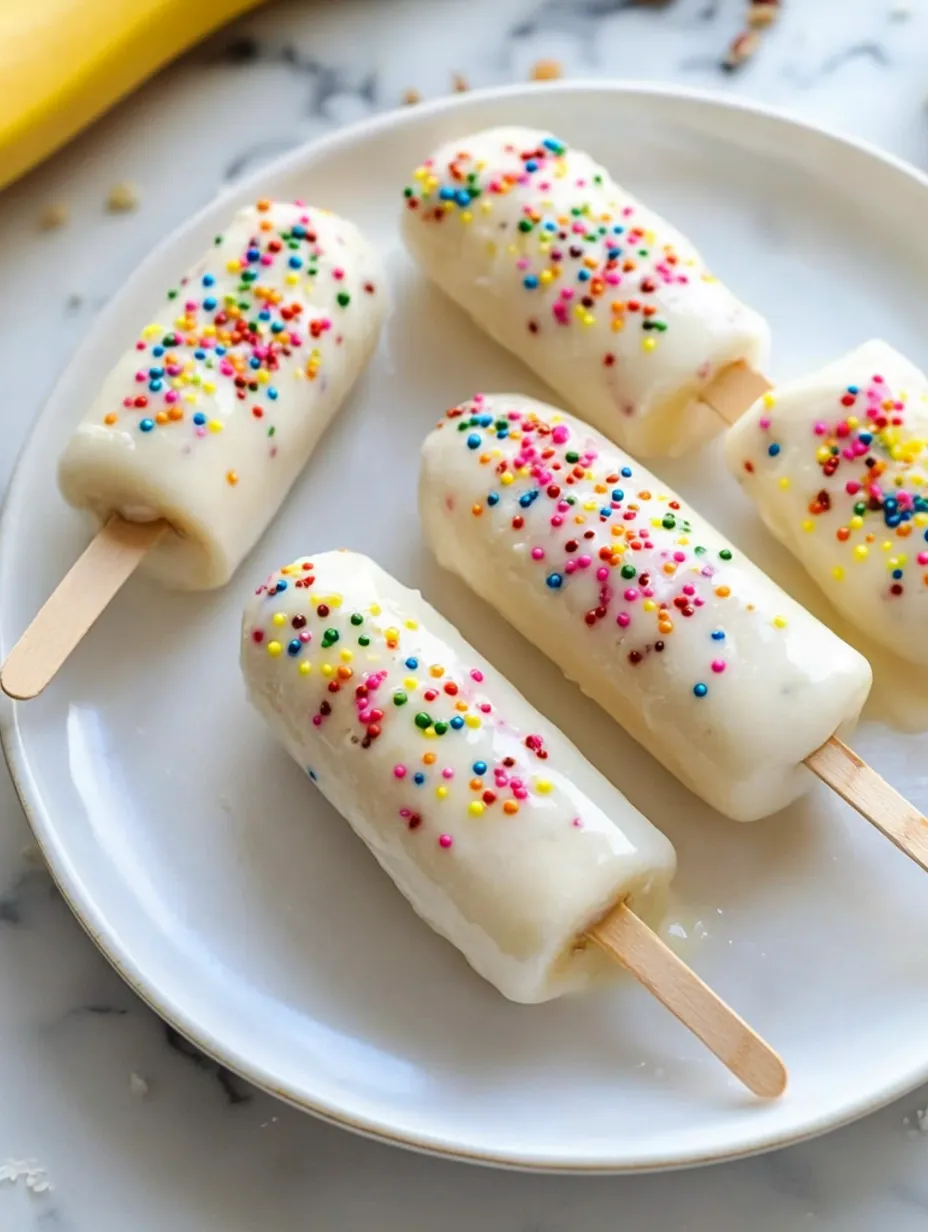
The vanilla yogurt coating is truly what makes these special. I once tried making these with plain yogurt and while still good, the slight tanginess of unsweetened yogurt didn't quite hit the mark for my younger taste-testers. The vanilla variety adds just enough sweetness without needing additional sugar, striking that perfect balance between treat and healthy snack.
Making Ahead and Storage
These banana pops keep beautifully in the freezer for up to two weeks when properly stored. After the initial freeze, wrap each pop individually in plastic wrap or place in sealed freezer bags to prevent freezer burn. When storing multiple layers, place parchment paper between layers to prevent sticking. The bananas will continue to darken slightly over time, but this is natural and doesn't affect taste.
Flavor Variations
The basic recipe serves as a wonderful canvas for countless variations. Try strawberry yogurt with freeze-dried strawberry pieces for a berry explosion, or chocolate yogurt with crushed graham crackers for a s'mores-inspired treat. For adults, consider adding a few drops of coffee extract to the vanilla yogurt or sprinkling with dark chocolate shavings and sea salt for a sophisticated flavor profile.
Kid-Friendly Preparation Tips
This recipe offers excellent opportunities to involve children in the kitchen. Younger kids can help insert the sticks and add sprinkles, while older children can assist with the dipping process. Create a topping bar with various options in small bowls and let everyone customize their own banana pop. This activity not only produces a healthy snack but also builds confidence in the kitchen and creates lasting memories.
Serving Suggestions
These frozen treats make wonderful after-school snacks but can also be elevated for entertaining. For a dessert party, create a banana pop bar with various yogurt flavors and topping options. They pair beautifully with fruit platters or as a lighter alternative alongside richer desserts. During summer gatherings, serve them in colorful cupcake liners to catch any drips as they begin to melt.
Frequently Asked Questions
- → Can I use other fruits instead of bananas?
Yes, you can experiment with fruits like strawberries or pineapple chunks. Keep in mind that the texture and freezing time may vary depending on the fruit.
- → What kind of yogurt works best?
Thick, creamy yogurts like Greek yogurt work great as they adhere well to the fruit. You can also use flavored or plant-based yogurts to match your preferences.
- → How can I make these pops more nutritious?
Incorporate healthy toppings such as crushed nuts, seeds, or dried fruit for added nutrients and flavor.
- → How should I store leftover pops?
Wrap each frozen pop individually in plastic wrap or parchment paper, and store them in an airtight container in the freezer for up to a week.
- → What are the best toppings for these frozen pops?
Popular toppings include sprinkles, chopped nuts, mini chocolate chips, shredded coconut, or crushed cookies. Pick toppings that pair well with yogurt and bananas.
- → Can I make these ahead of time for a party?
Absolutely! Prepare and freeze the banana pops a day or two in advance. Serve them directly from the freezer, letting them soften for a minute if needed.