
 Pin it
Walking into my kitchen on game day, the aroma of garlic butter and melting cheese fills the air. These aren't just any sliders - they're a labor of love that combines the best of Italian deli tradition with modern party food convenience. Every bite delivers warm, cheesy comfort with a perfectly balanced kick of heat.
I discovered this recipe during a family reunion when my aunt brought over what looked like ordinary rolls. The moment she pulled back that foil, revealing golden-brown tops and melty cheese, I knew these would become a staple in my entertainment menu. The way everyone gathered around, reaching for seconds and thirds, told me these were something special.
Essential Components
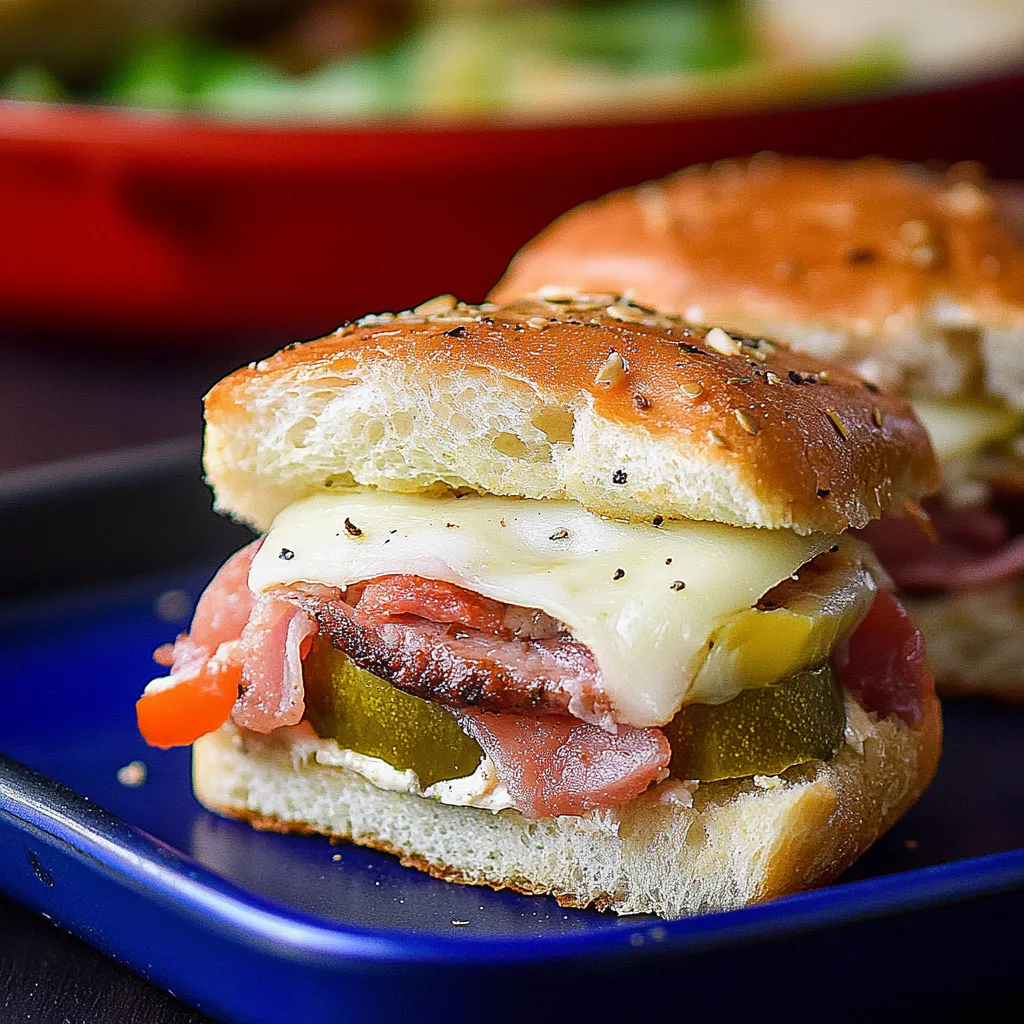
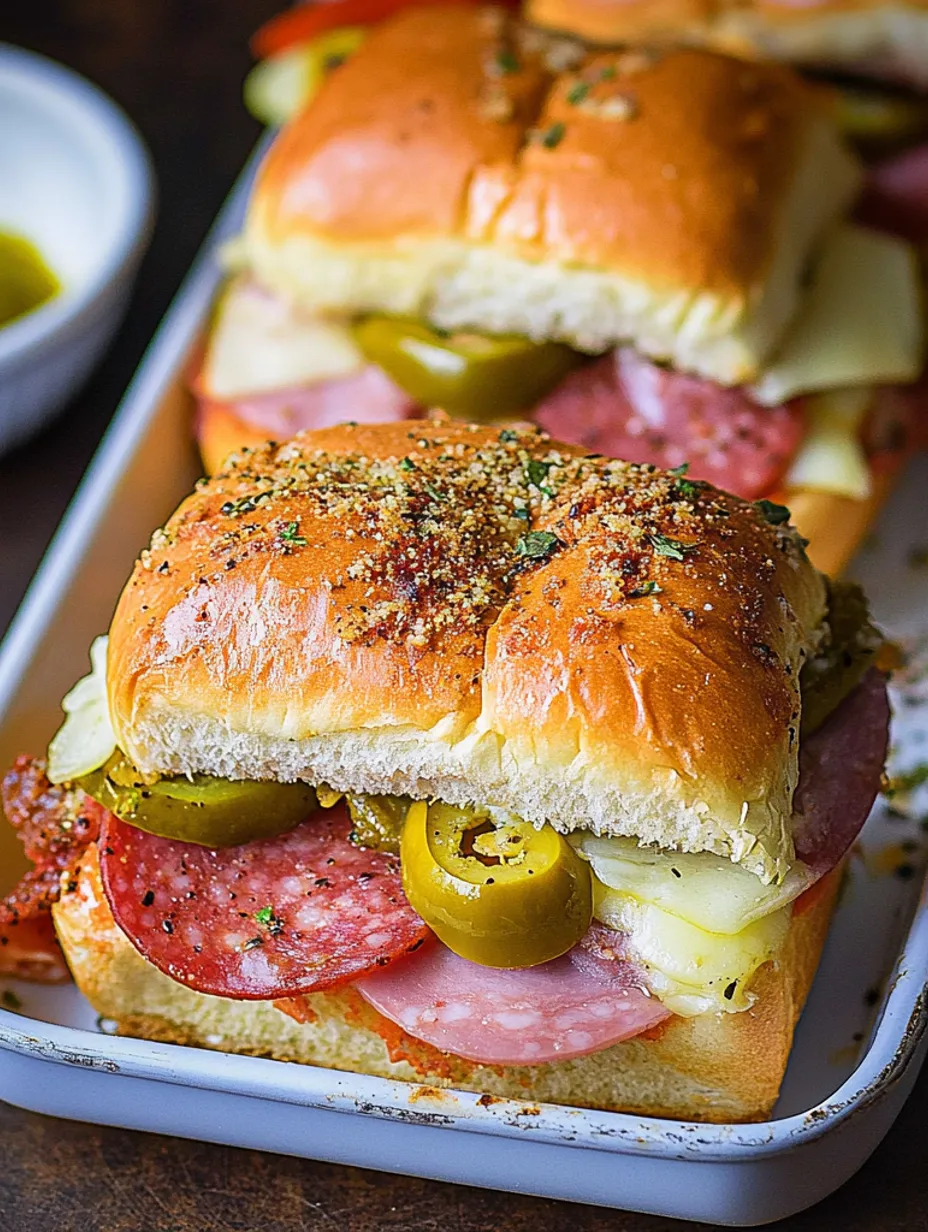
- Hawaiian Rolls: Their pillowy texture and subtle sweetness create the perfect foundation
- Premium Deli Meats: Each layer brings its own distinct flavor
- Aged Provolone: Adds that crucial sharp, melty element
- Fresh Garlic: Infuses the butter with aromatic depth
- Italian Seasoning: Brings authentic Italian sub flavor
- Specialty Peppers: Add brightness and that perfect kick
Creating Your Sliders
- Preparation Setup:
- Begin with a clean workspace and all ingredients at room temperature - this might seem fussy, but room-temp ingredients blend better and create that perfect melt. I've learned through countless batches that organization makes the whole process smoother.
- Bread Foundation:
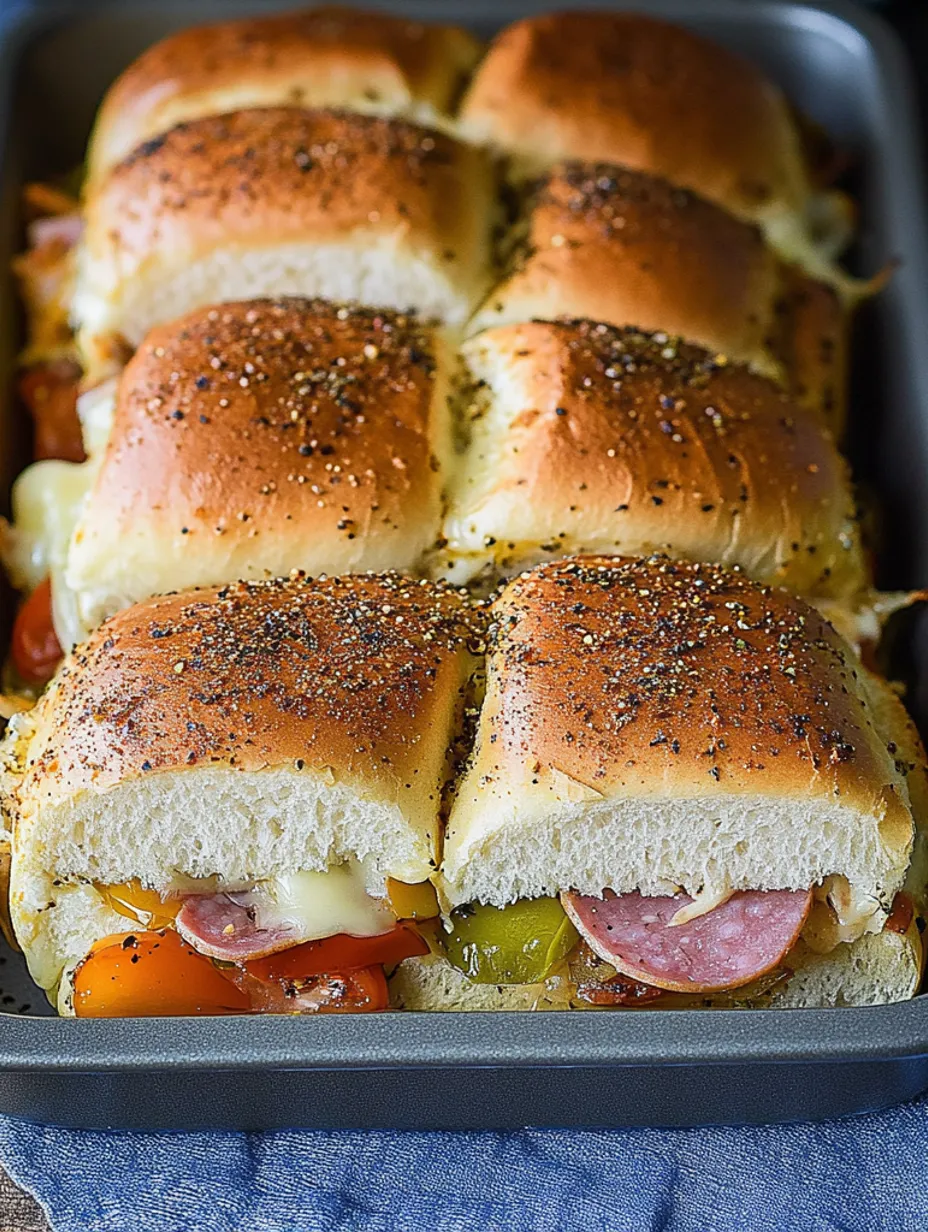
- Slice your Hawaiian rolls horizontally, keeping them connected. The trick here, learned from my Italian mother-in-law, is to use a serrated knife in one smooth motion. Place the bottom half in your baking dish - this becomes the canvas for your masterpiece.
- Layering Magic:
- Start with a thin layer of ham, followed by salami ribbons, then pepperoni circles. Each meat should slightly overlap, creating a blanket of flavor. This method ensures every bite has the perfect ratio of ingredients.
- Cheese Architecture:
- Layer your provolone strategically - I place it both under and over the meats. The bottom layer protects the bread from getting soggy, while the top layer creates that Instagram-worthy cheese pull.
- Pepper Perfection:
- Distribute your peppers thoughtfully. I alternate between peperoncini and cherry peppers, ensuring each slider gets its fair share of heat. Their bright acidity cuts through the rich meats and cheese, creating balance.
- Butter Brilliance:
- The butter mixture is where kitchen magic happens. Slowly melt your butter with fresh garlic, letting the flavors infuse. Add Italian seasoning and watch it bloom in the warm butter. This aromatic mixture becomes your golden ticket to flavor town.
- Final Assembly:
- Replace the top layer of rolls and brush every inch with your seasoned butter. Let it seep into the nooks and crannies - this creates that irresistible crispy top we all fight over.
The first time I brought these to my neighborhood potluck, three people asked for the recipe before the night was over. The secret? Taking time with each layer and never skimping on quality ingredients.
Entertaining Excellence
Arrange these sliders on a rustic wooden board or elegant platter. Sometimes I create a "slider station" with extra peppers, marinara for dipping, and fresh basil leaves for garnish. It's amazing how presentation elevates even the simplest foods.
Make It Party Perfect
For larger gatherings, organize a slider assembly line. I've done this with my kids - one handles meats, another cheese, while I manage the pepper placement. It becomes a fun family activity while preparing for guests.
Serving Success
These beauties shine best when served warm, about 5-10 minutes after leaving the oven. I've discovered that placing them on a heated serving tray keeps them at that perfect temperature throughout the party.
Pairing Perfection
- Italian antipasto platter alongside
- Light green salad with vinaigrette
- Crispy seasoned potato wedges
- Marinated vegetable platters
Creative Variations
Transform these sliders based on your crowd's preferences or what's in your deli drawer. Some of my favorite twists include:
- Mediterranean Style:
- Swap regular provolone for smoked, add roasted red peppers, and brush with oregano-infused olive oil.
- Spice Lover's Dream:
- Add calabrian chilies, spicy capicola, and pepper jack cheese for serious heat lovers.
- Veggie Lover's Version:
- Layer with grilled vegetables, pesto, and fresh mozzarella for vegetarian guests.
Storage Solutions
- Make-Ahead: Assemble up to 24 hours in advance
- Keep wrapped tightly in the fridge
- Butter mixture stored separately until baking
- Leftovers (if any!) stay fresh for 2-3 days
Frequently Asked Questions
- How do I prevent soggy bottoms?
- Create a protective cheese layer on the bottom bun, and never add wet ingredients directly against the bread. I learned this trick after several batches of trial and error.
- Can I make these for a larger crowd?
- Absolutely! I've made these for parties of 50+ people. The key is assembly-line preparation and using multiple baking dishes.
- What's the best way to transport them?
- Transport unbaked and covered. I've found that baking on-site creates that fresh-from-the-oven magic everyone loves.
- How spicy are these really?
- They have a pleasant kick that builds, but isn't overwhelming. My seven-year-old nephew enjoys them, though he picks out the peppers.
- Can I freeze these?
- While possible, I don't recommend freezing. The fresh assembly makes a noticeable difference in quality.
- Any tips for cutting them cleanly?
- Let them rest 5 minutes after baking, then use a sharp serrated knife with a gentle sawing motion.
Tips For Success
- Temperature Matters:
- Let ingredients come to room temperature. Preheat oven completely before baking. Rest 5 minutes before serving.
- Quality Components:
- Fresh bakery rolls make a difference. Premium deli meats create better flavor. High-quality cheese melts more smoothly.
- Professional Insights:
- Layer meats in loose folds for texture. Create a butter barrier on top buns. Use parchment paper for easy removal.
- Common Mistakes to Avoid:
- Rushing the assembly process. Skipping the resting period. Over-stuffing the sliders.
These Italian party sliders have become more than just another recipe in my collection - they're now a requested favorite at every gathering I attend. From casual game days to elegant holiday parties, they bridge the gap between casual and sophisticated entertaining. The way people's faces light up when they take that first bite, how conversations pause momentarily to savor the flavors - that's what makes cooking for others so rewarding. Whether you're an experienced host or just starting your entertaining journey, these sliders prove that sometimes the simplest combinations create the most memorable meals. I hope they bring as much joy to your table as they've brought to mine.
Remember, cooking is about more than following a recipe - it's about creating moments and memories. These sliders have helped me do just that, one golden, cheesy bite at a time.