
 Pin it
I discovered this homemade crunch bar recipe four years ago when I was desperately trying to satisfy my candy bar craving during a late-night Netflix binge. Store-bought versions kept disappointing me - either too sweet or not crunchy enough. After several test batches and some burned chocolate (don't ask), I finally nailed a version that blows the original out of the water. My sister swears these are better than the packaged ones, and she's the pickiest chocolate eater I know.
Last summer I brought these to my neighborhood block party and three different people cornered me for the recipe before the night was over. My neighbor Tom, who claims he "doesn't like sweets," ate four pieces when he thought nobody was watching. That's when I knew this recipe was a keeper.
Simple Ingredients
- Crispy rice cereal - 3 cups (gluten-free works)
- Peanut butter - ½ cup (crunchy or smooth)
- Chocolate chips - 1 ½ cups (high-quality recommended)
- Maple syrup - ¼ cup (real maple syrup)
- Coconut oil - 1 tablespoon
Quick Process
Prep Your Station:Pour crispy rice cereal into a large bowl. Line an 8x8 or 9x13 baking dish with parchment paper (with overhang).
Melt The Chocolate Mixture:Combine chocolate chips, peanut butter, maple syrup, and coconut oil in a microwave-safe bowl. Heat in 30-second intervals, stirring until melted and smooth (about 1-2 minutes total).
Mix It All Together:Pour melted chocolate mixture over the cereal. Stir gently but thoroughly until all cereal is coated.
Chill Until Set:Press mixture evenly into the lined pan. Refrigerate for about 1 hour or freeze for 20 minutes until firm.
I started making these when my daughter went through a phase of requesting specific candies in her lunch box. Rather than buying the processed versions, I experimented with homemade alternatives. These were such a hit that she started trading them with friends at school. Apparently one kid offered her his entire lunch for one bar! The PTA mom in me was slightly horrified, but the recipe developer in me was secretly pleased.
Texture Heaven
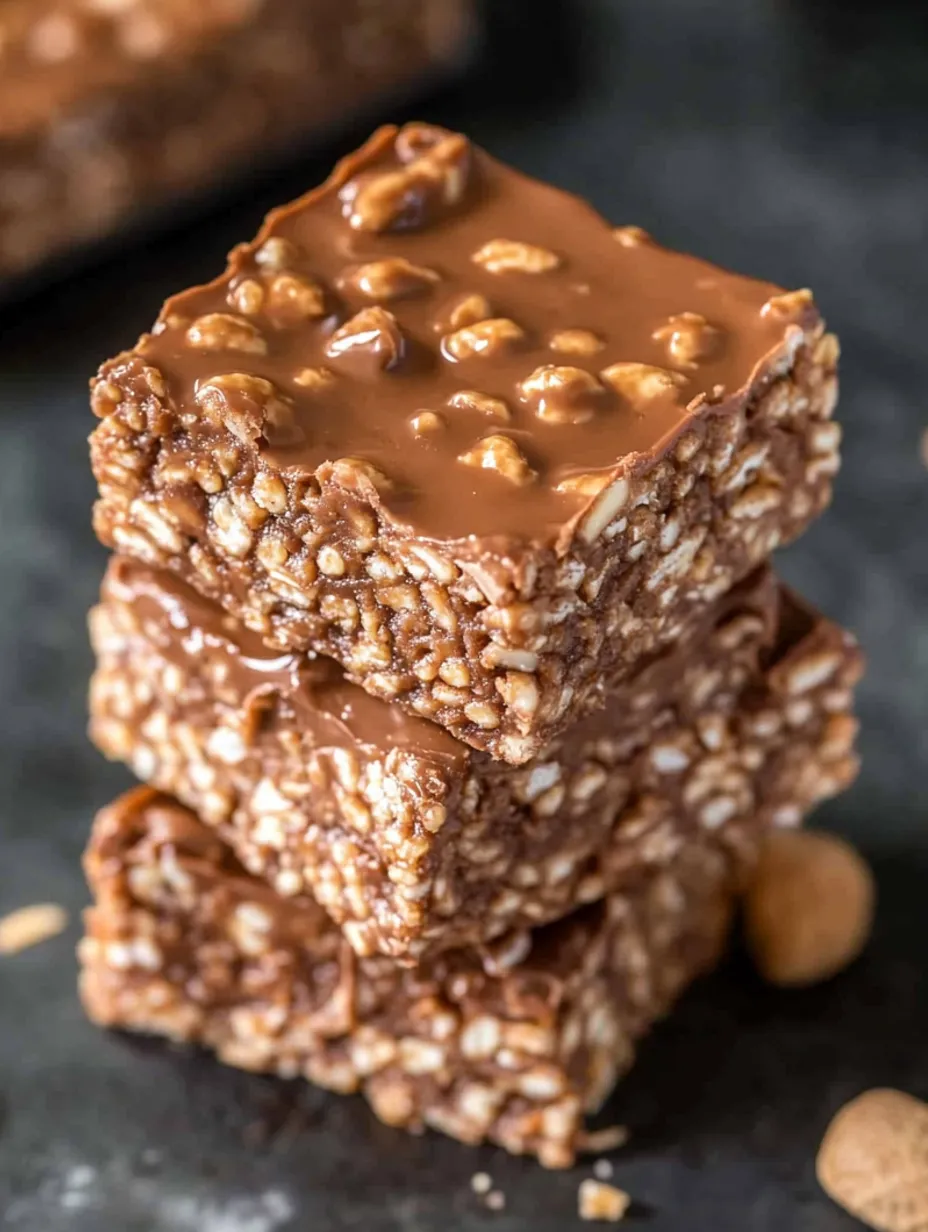
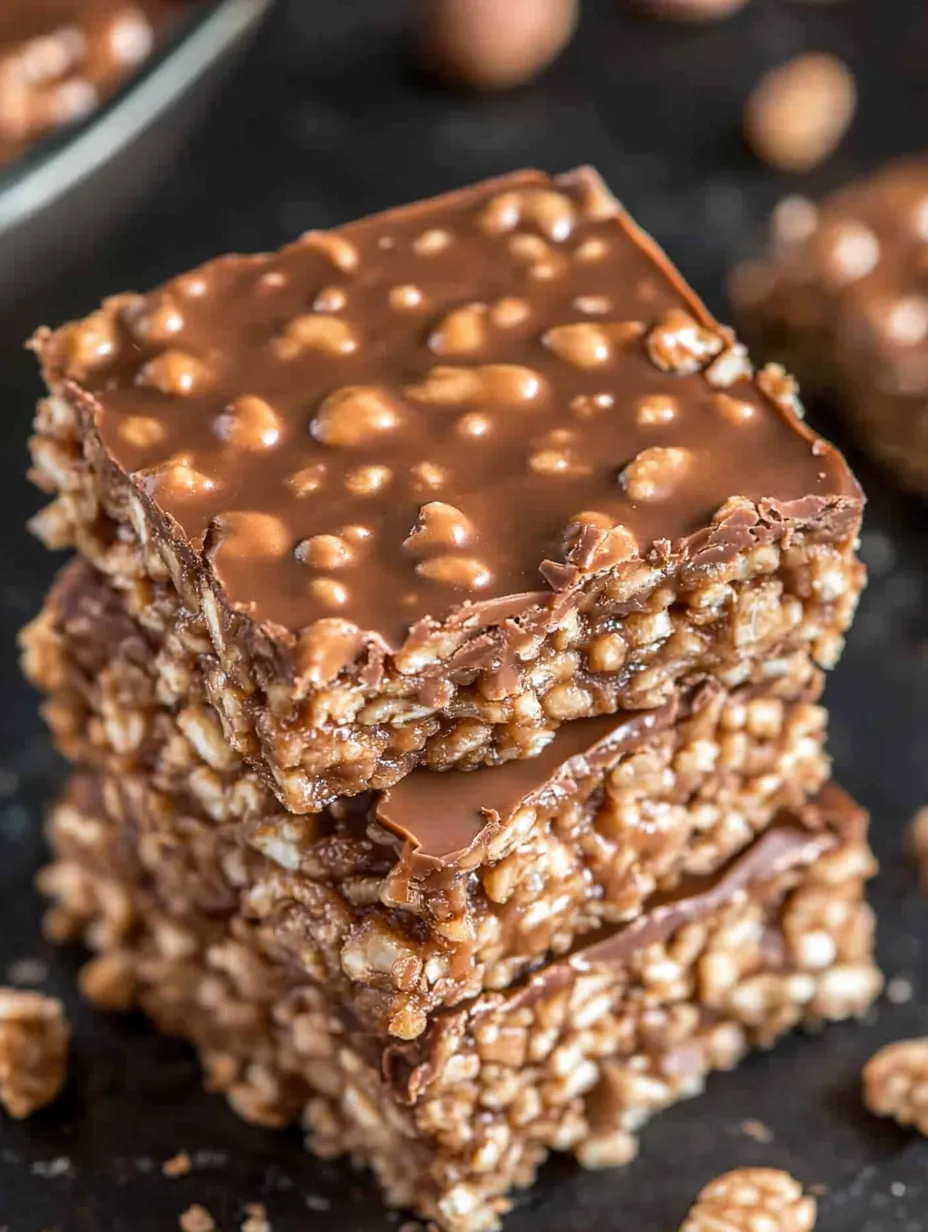
The magic of these bars is all in the texture contrast. The crispy rice cereal stays crunchy even when surrounded by chocolate, creating that satisfying snap with every bite. Using crunchy peanut butter adds another dimension with little bits of peanut scattered throughout. The chocolate itself sets up with just the right firmness - solid enough to hold its shape but melts immediately when it hits your mouth.
What makes these bars special compared to other recipes is the addition of maple syrup and peanut butter. Most copycat recipes use just chocolate and cereal, which is fine but one-dimensional. The peanut butter adds creaminess and depth, while the maple syrup brings subtle sweetness and helps with the perfect texture. Together, they transform a basic chocolate bar into something truly crave-worthy.
I've found these bars are perfect for those times when you want something sweet but not too heavy. They satisfy chocolate cravings without being overly rich or causing immediate sugar crash. My husband grabs one after dinner instead of a bigger dessert, and they've become my go-to afternoon pick-me-up with coffee.
Storage Notes
Keep in the fridge for up to two weeks (though they've never lasted that long in my house). Freeze individually wrapped bars for up to 3 months for emergency chocolate stashes. Let frozen bars thaw for about 10 minutes before eating for the best texture.
Easy Variations
Try almond butter instead of peanut butter for a more subtle nutty flavor. Add a sprinkle of flaky sea salt on top before chilling for sweet-salty perfection. Mix in a handful of chopped dried cherries for a chocolate-cherry twist.
Baker's Tips
Press firmly when shaping the bars to ensure they hold together when cut. Use a warm knife to cut clean slices - run it under hot water and wipe dry between cuts. For extra fancy presentation, drizzle with extra melted chocolate after cutting.
I originally found a basic version of this recipe in an old community cookbook from my mom's shelf, but it called for corn syrup and margarine. Over the years, I've tweaked it to use more natural ingredients without sacrificing flavor or texture. The current version has been my standby for about five years now, and I'm still not tired of making them. There's something deeply satisfying about creating something this delicious with just five ingredients and practically no effort. My kids have started making these on their own, which both saves me time and ensures they always have a homemade treat option available. Win-win in my book!
Frequently Asked Questions
- → Can I use a different nut butter instead of peanut butter?
- Absolutely! This recipe works great with almond butter, cashew butter, or sunflower seed butter if you need a nut-free option.
- → Do these need to be refrigerated?
- They can be stored at room temperature for up to 2 weeks, but refrigerating them will give them a firmer texture and they'll last longer.
- → What kind of chocolate chips work best?
- Any chocolate chips work well! Use semi-sweet for traditional flavor, dark chocolate for less sweetness, or dairy-free chips to keep the recipe vegan.
- → Can I substitute the maple syrup?
- Yes, honey works well (though not vegan), as does agave nectar. For sugar-free versions, try a keto maple syrup substitute.
- → My bars are too soft. What went wrong?
- They probably need more time to chill. Pop them back in the refrigerator for at least an hour, or try the freezer for 15-20 minutes to firm them up quickly.