
 Pin it
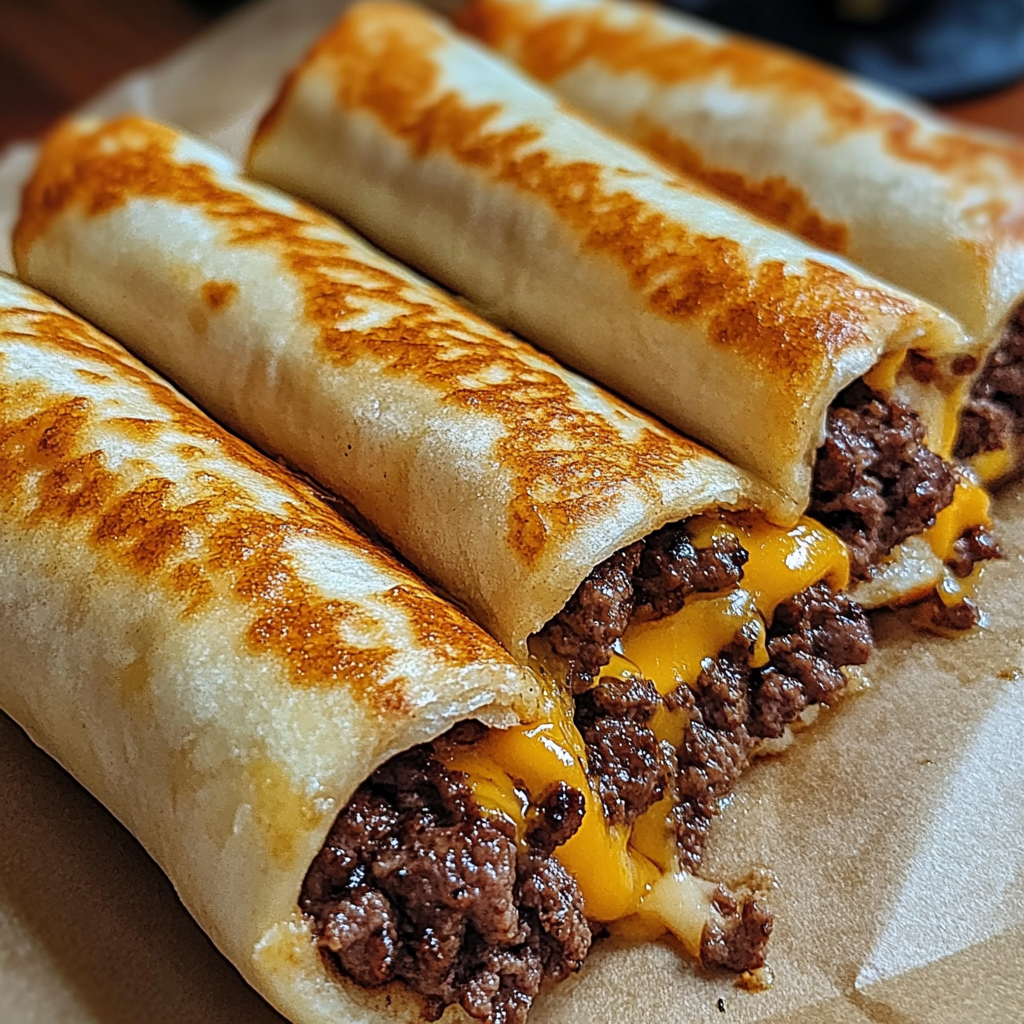
This savory twist on crescent rolls transforms simple ingredients into a crowd-pleasing dinner that combines the flavors of a cheeseburger with the convenience of a handheld treat. The garlicky butter coating gives these beef and cheese rollups an irresistible golden finish that will have everyone reaching for seconds.
I first made these rollups when I needed a quick dinner solution after a long day at work. What started as a kitchen experiment has become our Friday night tradition, with my family hovering around the oven as the cheesy aroma fills our home.
Ingredients
- Ground beef forms the hearty base delivers rich flavor and satisfying texture
- Diced onions add sweetness and depth to the meat mixture
- Shredded cheddar cheese creates the essential gooey meltiness that makes these irresistible
- Crescent roll dough provides a flaky buttery vessel that turns golden in the oven
- Garlic powder infused in both the filling and butter coating for layered flavor development
- Melted butter brushed on top transforms the crescents into glossy golden pockets
Step-by-Step Instructions
- Brown the Beef Mixture
- Cook the ground beef with diced onions over medium heat, breaking it into small crumbles as it cooks. This should take about 8 minutes until no pink remains. The onions will soften and become translucent, adding sweetness to balance the savory meat. Be sure to add all seasonings during this step so the flavors fully incorporate.
- Prepare the Filling
- After draining excess fat, let the meat mixture cool for about 5 minutes before folding in the shredded cheese. This cooling period prevents the cheese from melting completely in the pan while still allowing it to incorporate well with the beef. The residual heat will slightly melt the cheese, creating a cohesive mixture that stays together when rolled.
- Form the Rollups
- Unroll your crescent dough on a clean work surface, separating into triangles along the perforations. Place a generous tablespoon of filling on the wide end of each triangle, making sure to leave about half an inch of dough uncovered around the edges. This prevents overflow during baking.
- Roll and Seal
- Starting from the wide end, tightly roll each crescent toward the pointed tip, gently tucking in any filling that tries to escape. Place each rollup on your prepared baking sheet with the pointed end underneath to prevent unraveling during baking. Space them about two inches apart to allow for expansion.
- Add the Garlic Butter
- Combine melted butter with garlic powder in a small bowl, stirring until well incorporated. Using a pastry brush, generously coat the top of each rollup with this mixture, ensuring even coverage. This step is crucial for developing that beautiful golden color and aromatic finish.
The garlic butter is my secret weapon in this recipe. I discovered its transformative power one night when I was low on ingredients but wanted to elevate a simple meal. My son declared them better than regular cheeseburgers, and I have to agree the buttery garlic finish makes these rollups something special.
Make-Ahead Options
These rollups can be completely assembled up to 24 hours in advance and stored covered in the refrigerator. Simply brush with the garlic butter just before baking. This makes them perfect for planning ahead for parties or busy evenings. The unbaked rollups might need an extra 2-3 minutes in the oven when cooking from cold.
Customization Ideas
Think of these rollups as a blank canvas for your favorite burger flavors. Add crumbled bacon to the filling for a bacon cheeseburger variation. Incorporate finely chopped pickles or a teaspoon of pickle relish for a classic burger taste. For mushroom lovers, sauté 1/2 cup of finely chopped mushrooms with the onions before adding the beef. Each variation maintains the essential cheeseburger experience while offering something new.
Serving Suggestions
Create a dipping station with small bowls of ketchup, mustard, and ranch dressing for an interactive eating experience. For a complete meal, serve alongside a simple green salad with vinegarette to balance the richness. These rollups also pair wonderfully with crispy oven fries or sweet potato wedges for a complete burger and fries experience in a new format.
Storage and Reheating
These rollups maintain their quality for up to 3 days when stored in an airtight container in the refrigerator. To reheat, place them in a 325°F oven for about 10 minutes until warmed through. Avoid microwave reheating if possible as it can make the crescent dough soggy. For best results, place on a wire rack over a baking sheet when reheating to maintain the crisp exterior.
Frequently Asked Questions
- → Can I use a different type of dough for the rollups?
Yes, you can substitute crescent dough with puff pastry, biscuit dough, or even homemade dough for a similar result. Adjust baking time as needed depending on the type of dough.
- → What dipping sauces pair well with these rollups?
Classic dipping sauces like ketchup, ranch, honey mustard, or spicy mayo work wonderfully. You can also try barbecue sauce or garlic aioli for added flavor.
- → Can I make these rollups ahead of time?
Yes, you can prepare the beef mixture and assemble the rollups ahead of time. Store them uncooked in the refrigerator and bake them fresh when ready to serve.
- → Can I freeze the rollups?
Yes, you can freeze the baked rollups. Allow them to cool completely, then store in an airtight container or freezer-safe bag. To reheat, bake at 350°F until heated through.
- → Can I add other ingredients to the filling?
Absolutely! You can customize the filling with ingredients like sautéed mushrooms, diced bell peppers, or crumbled bacon for extra flavor and texture.
- → How do I prevent the filling from spilling out during baking?
Make sure the triangles are tightly rolled, starting from the wide end and sealing well at the seams. Place the rollups seam-side down on the baking sheet to help them stay intact.