 Pin it
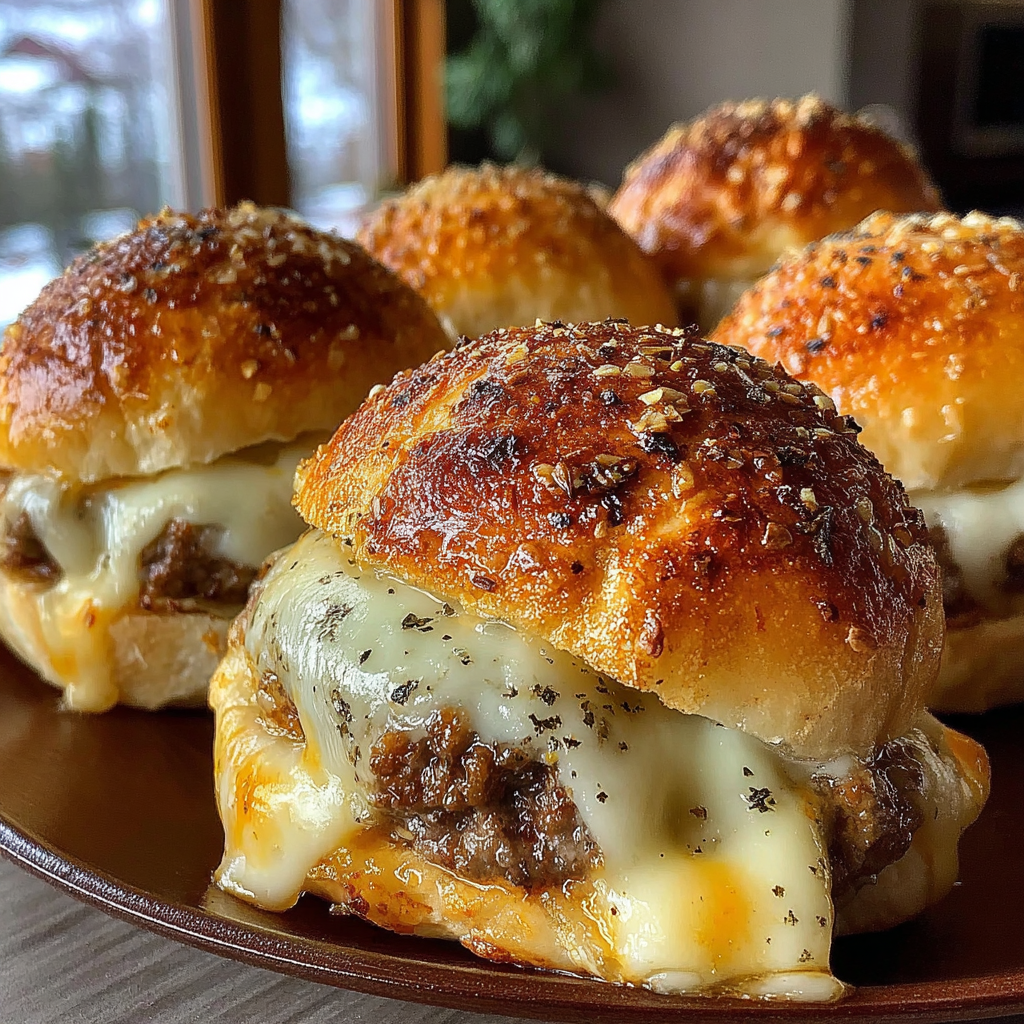
This savory garlic parmesan cheeseburger bombs recipe transforms classic burger flavors into delightful pull-apart bites perfect for game day gatherings or weeknight dinners. The combination of seasoned beef and melty cheese wrapped in golden biscuit dough creates an irresistible handheld treat that disappears quickly at any table.
I first made these cheeseburger bombs for a Super Bowl party, and they disappeared faster than any other dish. Now they're requested at nearly every casual gathering I host, and my nephew insists on helping form the little dough packages whenever he visits.
Ingredients
- Ground beef preferably 80/20 for the perfect balance of flavor and juiciness
- Garlic powder infuses deep savory notes throughout the meat mixture
- Onion powder adds sweet aromatic flavor without the texture of chopped onions
- Salt enhances all the flavors and is essential for properly seasoned meat
- Black pepper provides subtle heat and complexity
- Shredded cheddar cheese offers that classic sharp burger cheese flavor
- Shredded mozzarella cheese creates an irresistible cheese pull when melted
- Refrigerated biscuit dough makes this recipe quick and convenient look for buttermilk variety for best flavor
- Unsalted butter creates a rich golden exterior when brushed on before baking
- Parmesan cheese forms a savory crispy coating that takes these bombs to the next level
- Fresh parsley optional but adds bright color and freshness to finish the dish
Step-by-Step Instructions
- Prepare the Oven and Beef
- Preheat your oven to 375°F to ensure it reaches proper temperature. Brown the ground beef in a skillet over medium heat, breaking it into small crumbles as it cooks. Make sure to drain excess grease thoroughly to prevent soggy bombs.
- Season the Meat Mixture
- Add garlic powder, onion powder, salt and pepper to the drained beef while still warm. This allows the spices to bloom and fully incorporate into the meat. Stir well until evenly distributed throughout the beef.
- Create the Filling
- Allow the seasoned beef to cool for about 5 minutes before adding both cheeses. Stir to combine until the cheese starts to slightly melt from the residual heat but isn't completely melted. This cooling step prevents the dough from becoming soggy when filled.
- Prepare the Dough
- Open the biscuit can and separate the dough pieces. Using your fingertips or the palm of your hand, gently flatten each biscuit into approximately 4inch circles on a clean work surface. Work carefully to maintain even thickness.
- Fill and Seal
- Place about 2 tablespoons of the beef and cheese mixture in the center of each flattened biscuit. Avoid overfilling which makes sealing difficult. Lift the edges of the dough up and around the filling, pinching firmly to seal completely. Roll between your palms to form a smooth ball.
- Arrange for Baking
- Place each filled bomb seamside down on a parchment lined baking sheet, spacing them about 2 inches apart to allow for expansion. The parchment prevents sticking and makes cleanup easier.
- Add Flavorful Topping
- Brush the tops and sides of each dough ball generously with melted butter using a pastry brush. Immediately sprinkle with garlic powder and grated Parmesan cheese so they adhere to the butter. This creates an irresistible flavor crust.
- Bake to Golden Perfection
- Bake in the preheated oven for 15 to 18 minutes, rotating the pan halfway through for even browning. Look for a deep golden color and listen for a hollow sound when tapped. The internal temperature should reach at least 160°F.

The secret to these bombs is getting a really good seal on the dough. I learned this after my first batch when several burst open during baking. Now I make sure to pinch the seams firmly and give each ball a good roll between my palms to ensure everything stays contained. There's something incredibly satisfying about breaking one open and watching the cheese stretch between the halves.
Storage and Reheating
These cheeseburger bombs keep beautifully in the refrigerator for up to 3 days in an airtight container. To reheat, place them in a 350°F oven for about 10 minutes until warmed through. You can also microwave them for 30 seconds, though they won't retain their crispy exterior. Avoid reheating more than once for food safety and quality reasons.
Creative Variations
Transform these bombs into different flavor experiences by switching up the fillings and toppings. Try pizza bombs with pepperoni and pizza sauce, breakfast bombs with scrambled eggs and bacon, or buffalo chicken bombs with shredded chicken and hot sauce. The technique remains the same, but you can create endless flavor combinations to suit your taste preferences or use up leftovers in the fridge.
Serving Suggestions
Serve these cheeseburger bombs with small bowls of ketchup, mustard, and pickle relish for dipping to complete the burger experience. A simple side salad with ranch dressing or crispy potato wedges makes this a complete meal. For parties, arrange them on a platter surrounding a central dipping sauce and watch them disappear within minutes.
Frequently Asked Questions
- Can I use a different type of cheese?
Yes, you can substitute cheddar and mozzarella with your preferred cheeses, such as gouda, pepper jack, or provolone for a different flavor profile.
- How do I prevent the dough from breaking during baking?
Make sure to tightly pinch the dough seams when sealing each bomb, and avoid overstuffing them with filling to prevent tearing while baking.
- Can I prepare these in advance?
Yes! Assemble the cheeseburger bombs, refrigerate them uncooked, and bake them fresh when ready to serve. They can be stored for up to 24 hours before baking.
- What can I serve alongside these cheeseburger bombs?
These pair well with dipping sauces like marinara, ranch, or mustard, and can be served with fresh salads or roasted vegetables for a complete meal.
- Can I use crescent roll dough instead of biscuit dough?
Yes, crescent roll dough works well as a substitute. Simply flatten it slightly before wrapping the filling to ensure proper coverage.
- How do I store leftovers?
Place leftover cheeseburger bombs in an airtight container in the refrigerator for up to 3 days. Reheat in the oven or an air fryer to maintain crispness.