
 Pin it
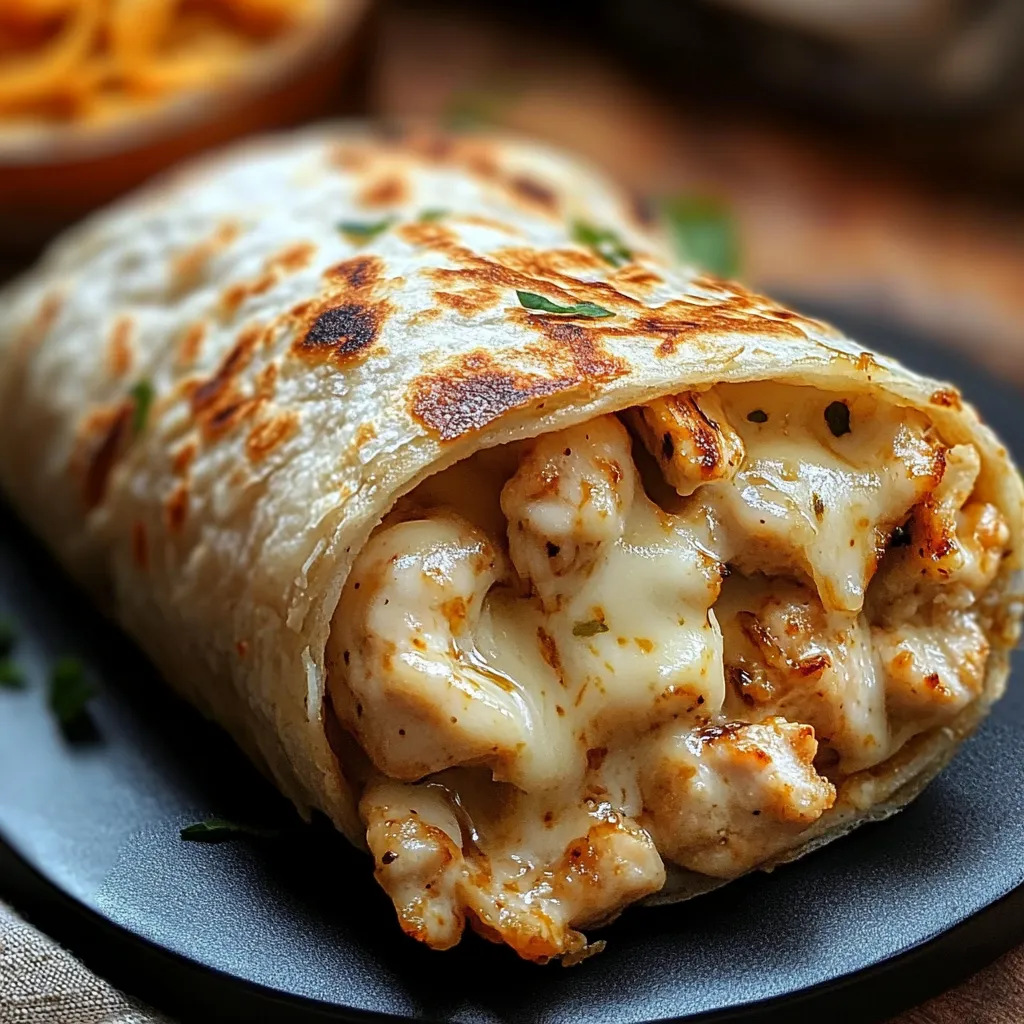
This cheesy garlic chicken wrap recipe has become my lifesaver for those hectic weeknights when cooking feels like a chore. The combination of juicy chicken and melty cheese wrapped in a toasty tortilla creates comfort food that comes together in minutes without sacrificing flavor.
I first created these wraps when my sister dropped by unexpectedly with her hungry teenagers. With nothing but leftover chicken and basic pantry items, I threw these together and they've been requesting them at every visit since.
Ingredients
- Cooked chicken: Two cups shredded or diced provides the perfect protein base and absorbs all the flavors beautifully. Rotisserie chicken works wonderfully here.
- Cream cheese: The quarter cup creates a creamy binding that holds everything together and adds richness.
- Shredded cheddar: Half a cup brings that classic melty cheese pull everyone loves. Choose a sharp variety for more flavor impact.
- Minced garlic: One teaspoon delivers essential aromatic flavor. Fresh gives the best punch, but jarred works in a pinch.
- Onion powder: The half teaspoon adds savory depth without the texture of fresh onions.
- Black pepper: Just enough to enhance the other flavors without overwhelming.
- Large tortillas: Choose flour tortillas that are fresh and pliable for easy wrapping.
- Fresh parsley: Optional but adds a pop of color and fresh herbal notes.
- Olive oil or butter: For creating that irresistible golden crust when toasting.
Step-by-Step Instructions
- Prepare the Filling:
- Combine the chicken, softened cream cheese, cheddar, garlic, onion powder, black pepper and optional parsley in a bowl. Ensure your cream cheese is properly softened to room temperature for about 30 minutes beforehand to avoid lumps. Mix thoroughly until you achieve a cohesive filling where the cream cheese coats all pieces of chicken evenly.
- Assemble the Wraps:
- Lay a tortilla flat on your work surface and spoon approximately half cup of filling into the center, forming a horizontal line across the middle but leaving about an inch of space on each side. Use the back of your spoon to press the mixture into an even layer. Fold the sides in first, then the bottom flap over the filling, tucking it in slightly under the mixture before rolling upward tightly to form a secure wrap.
- Toast the Wraps:
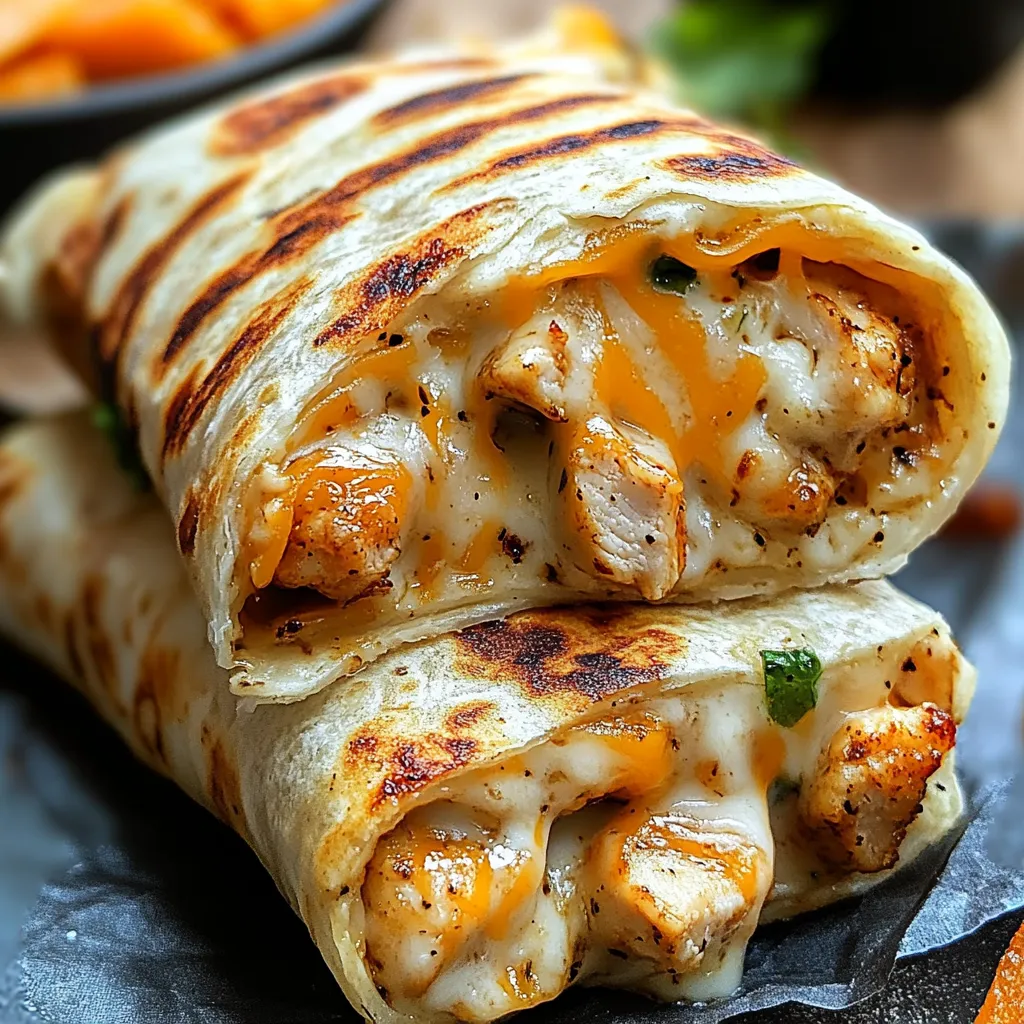
- Heat your skillet over medium heat and add a tablespoon of olive oil or butter. When the fat is shimmering but not smoking, place your wraps seam side down first to seal them shut. Apply gentle pressure with your spatula to ensure even contact with the pan. Allow them to toast for a full 2 to 3 minutes until you see a golden brown crust forming before carefully flipping to toast the other side.
- Serve and Enjoy:
- Remove from heat once both sides are crispy and golden. Let them rest for about 1 minute before slicing diagonally with a sharp knife. The slight cooling period allows the melted cheese interior to set just enough to not ooze out completely when cut.
The garlic is truly the star ingredient here. I once accidentally doubled the amount and discovered that garlic lovers in my family actually preferred the intensified version. Now I keep both versions in my recipe rotation depending on who's joining us for dinner.
Make Ahead Options
These wraps excel as a meal prep option. You can prepare the filling up to three days in advance and store it covered in the refrigerator. The assembled uncooked wraps can be tightly wrapped in plastic and refrigerated overnight. Just remember that tortillas tend to soften over time in the refrigerator, so they might need an extra minute of toasting to crisp up properly when you're ready to cook them.
Serving Suggestions
Transform these wraps into a complete meal by pairing them with complementary sides. A simple green salad dressed with lemon vinaigrette provides a refreshing contrast to the rich filling. For a more substantial meal, roasted vegetables like bell peppers and zucchini echo the Mediterranean flavors in the wrap. During summer months, I serve these alongside corn on the cob for a casual dinner that feels like a backyard cookout regardless of the weather.
Ingredient Substitutions
The beauty of this recipe lies in its flexibility. Swap the chicken for leftover turkey or even canned tuna for different protein options. Vegetarians can replace the meat with a cup of sautéed mushrooms and spinach. The cream cheese can be replaced with Greek yogurt for a lighter version, though the texture will be slightly different. Any melting cheese works well in place of cheddar. I often use pepper jack for a spicy kick or mozzarella for an extra stretchy cheese pull that my kids adore.
Frequently Asked Questions
- → Can I use leftover chicken for these wraps?
Yes, leftover chicken works perfectly for this recipe. Shred or dice it before mixing with the other ingredients.
- → Can these wraps be made ahead?
Absolutely! Assemble the wraps ahead of time and store in the fridge. Toast them just before serving for the best texture.
- → What other cheese can I use?
You can substitute cheddar with mozzarella, Monterey Jack, or even pepper jack for a different flavor profile.
- → Can I make these wraps vegetarian?
Yes! Replace the chicken with cooked and seasoned veggies like mushrooms, bell peppers, or even a plant-based meat alternative.
- → How do I ensure the wraps stay crispy?
Make sure the skillet or grill pan is preheated and cook over medium heat. Avoid overfilling the wraps to prevent sogginess.