
 Pin it
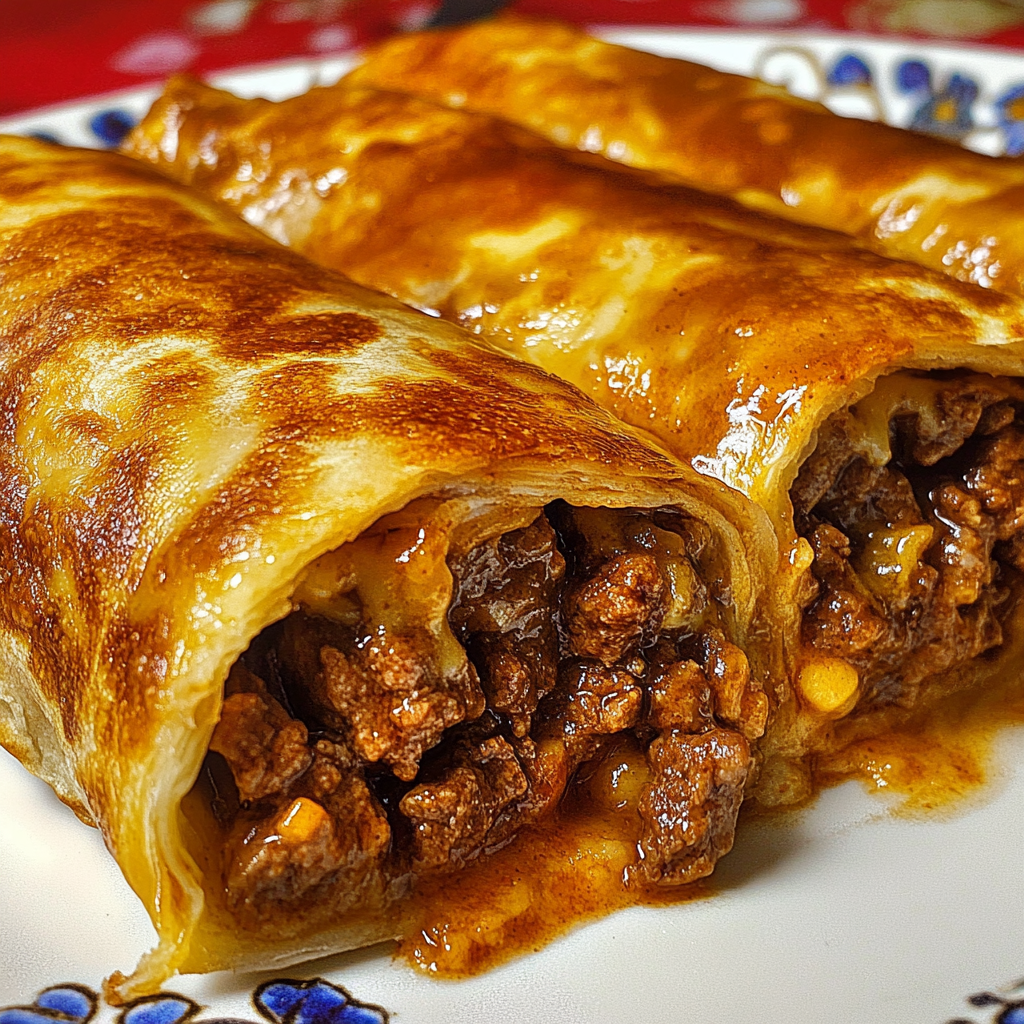
This beef and cheese chimichanga recipe transforms simple ingredients into crispy, golden bundles of Tex-Mex flavor that disappear fast at my dinner table. The combination of seasoned ground beef, melty cheese, and that satisfying crunch when you bite through the tortilla creates the ultimate comfort food experience.
I discovered chimichangas during my college years at a small family owned Mexican restaurant. After many failed attempts trying to recreate that perfect crispiness at home, this foolproof method finally captured the magic that makes my family rush to the table every time.
Ingredients
- Ground beef provides the hearty protein base look for 80/20 lean to fat ratio for best flavor
- Onion adds aromatic sweetness and texture choose a yellow onion for mild flavor
- Garlic powder infuses savory notes without the risk of burning that fresh garlic has
- Chili powder creates that signature Tex Mex flavor profile use medium heat for family meals
- Cumin brings earthy warmth that complements the beef beautifully
- Salt and pepper the essential seasoning duo that enhances all other flavors
- Cheddar cheese creates that gooey melty interior sharp varieties add more flavor dimension
- Salsa adds moisture and concentrated tomato flavor choose chunky varieties for texture
- Flour tortillas create the crispy exterior burrito size works best for proper folding
- Vegetable oil with a high smoke point creates that signature crispy exterior
Step-by-Step Instructions
- Brown the meat and aromatics
- Cook ground beef and chopped onion in a skillet over medium heat until no pink remains in the meat and the onions turn translucent. This should take about 5 minutes with regular stirring. After cooking completely drain excess fat to prevent soggy chimichangas.
- Season the mixture
- Add your garlic powder chili powder cumin salt and pepper directly to the hot meat mixture and stir thoroughly. This blooms the spices directly in the remaining fat releasing maximum flavor. Let the seasonings cook with the meat for at least 1 minute to eliminate any raw spice taste.
- Create the filling
- Lower your heat to prevent burning then add salsa and shredded cheese to the seasoned meat. Stir continuously until cheese completely melts and incorporates throughout the mixture. The filling should hold together but not be runny. Remove from heat and let cool slightly for easier handling.
- Prepare tortillas
- Warm tortillas in the microwave for 20 seconds under a damp paper towel or briefly on a dry skillet. This flexibility prevents tearing during the folding process. Work with one tortilla at a time keeping others covered to maintain pliability.
- Fill and fold
- Place approximately 1/3 cup of filling in the center of each tortilla slightly below the middle. Fold the bottom edge up over the filling then fold in both sides toward the center. Finally roll from the bottom up ensuring the seam is sealed underneath. Secure with toothpicks if necessary.
- Fry to perfection
- Heat oil to 350°F in a heavy skillet with high sides. The oil should reach about 1 inch depth for proper frying. Carefully place chimichangas seam side down first working in batches to avoid crowding. Fry each side for 2 to 3 minutes until deeply golden and crispy watching carefully to prevent burning.
- Drain and serve
- Remove fried chimichangas using tongs or a slotted spoon placing them on paper towels to absorb excess oil. Let them rest for 2 minutes before serving to allow the exterior to reach maximum crispness and the interior to set slightly.
The secret to these chimichangas is that quick blast in hot oil that creates the magical texture contrast. My grandmother taught me to listen for the sizzle when the chimichanga first hits the oil—that sound means you'll get that perfect crispiness that makes this dish so special.
Make Ahead Options
Prepare these chimichangas up to the frying stage and refrigerate them wrapped individually in plastic for up to 24 hours. This makes them perfect for entertaining or busy weeknights when you need dinner in minutes. The meat filling alone can be made up to three days ahead and stored in an airtight container. When ready to serve simply assemble and fry for that fresh made taste without the prep work.
Baked Alternative
For a lighter version these chimichangas can be baked instead of fried. Preheat your oven to 425°F brush each assembled chimichanga with a light coating of oil and place seam side down on a baking sheet. Bake for 15 to 20 minutes until golden and crispy turning halfway through cooking time. While not identical to the fried version this method still produces delicious results with approximately 30% fewer calories.
Serving Suggestions
Transform these chimichangas into a complete Mexican feast by serving them alongside cilantro lime rice and refried beans. For toppings create a bar with guacamole pico de gallo shredded lettuce diced tomatoes jalapeños and Mexican crema. This interactive serving style has become a Friday night tradition in my home allowing everyone to customize their plate exactly how they like it.
Frequently Asked Questions
- → What is the best way to fold a chimichanga?
To fold a chimichanga, place the filling in the center of a warmed tortilla. Fold in the sides, then roll up tightly like a burrito to keep the filling secure during frying.
- → Can I bake chimichangas instead of frying them?
Yes, you can bake them at 400°F for about 20 minutes, brushing the tortillas with oil to achieve a crispy texture.
- → What can I serve with chimichangas?
Chimichangas pair well with sour cream, shredded lettuce, extra salsa, guacamole, or a side of rice and beans for a complete meal.
- → How do I prevent the filling from spilling out?
Make sure to avoid overfilling the tortilla and roll it tightly, ensuring the seam is placed face-down in the oil while frying.
- → Can I prepare chimichangas in advance?
You can prepare the beef filling ahead of time and store it in the refrigerator. Assemble and fry the chimichangas just before serving for the best texture.