
 Pin it
Cheeseburger Bombs are my go to for casual gatherings and cozy nights when I crave the flavors of a classic burger but want a fun handheld twist. With gooey cheddar tucked inside pillowy bread and a golden slick of garlic butter crust these treats always disappear first from the plate.
The first time I baked these for game day my friends ended up eating them right off the tray before I could even set out the dipping sauces. Even the kids were wild for them and now I always keep a roll of biscuit dough on hand just in case.
Ingredients
- Ground beef: brings the familiar savoriness of burgers Use freshly ground if you can find it
- Onion: adds juicy sweetness Finely chop for even cooking
- Ketchup and yellow mustard: lend classic burger tang Opt for a ketchup with real sugar for best flavor
- Salt and black pepper: balance the richness Season as you cook and taste as you go
- Shredded cheddar cheese: melts perfectly in the filling Go for sharp cheddar for more bite or cube it for pockets of cheesy goodness
- Biscuit dough or pizza dough: forms the puffy shell A quality refrigerated biscuit will save time or use pizza dough for more chew
- Melted butter: forms the base of the garlic butter Choose unsalted so you can control seasoning
- Garlic: fresh or powder decides the aroma Freshly minced will pack the most punch
- Parmesan cheese: gives that craveable salty finish Use grated Parmigiano Reggiano if you can
- Parsley: sprinkles a touch of fresh flavor Fresh is brighter but dried works in a pinch
Step-by-Step Instructions
- Prepare the Filling:
- Cook your finely chopped onion in a skillet over medium heat until it turns translucent and soft This unlocks its natural sweetness making the base of your filling
- Add in the ground beef and continue cooking breaking it into small crumbles Stir until no pink remains and the meat is lightly browned
- Stir in the ketchup mustard salt and pepper Cooking for just a minute infuses the beef with tangy burger flavor Remove it from the heat and let it cool a bit before adding your cheese so it stays perfectly melty not greasy
- Mix in the shredded cheddar or use small cubes if you want gooey melted centers
- Shape the Bombs:
- Preheat your oven to the right temperature and prepare your baking sheet with parchment paper Keep this ready to prevent sticking
- Flatten each ball of dough into a three inch round circle Make sure the edges are slightly thinner than the middle
- Place a generous tablespoon of your cooled filling in the center Top with a cheese cube if using
- Carefully pull up the edges of the dough and pinch to seal Tuck the seam under and roll gently between your hands for a smooth finish
- Set each bomb seam side down spaced an inch apart
- Make the Garlic Parmesan Butter:
- Combine melted butter minced garlic parmesan cheese parsley and a pinch of salt in a small bowl
- With a pastry brush coat each bomb all over with this mixture before they bake
- Bake and Finish:
- Place your tray in the oven and bake until the bombs are a deep golden brown with sizzling edges about fifteen to eighteen minutes
- As soon as they come out brush with a little more garlic butter The heat helps soak in all the flavor giving a gorgeous shiny crust
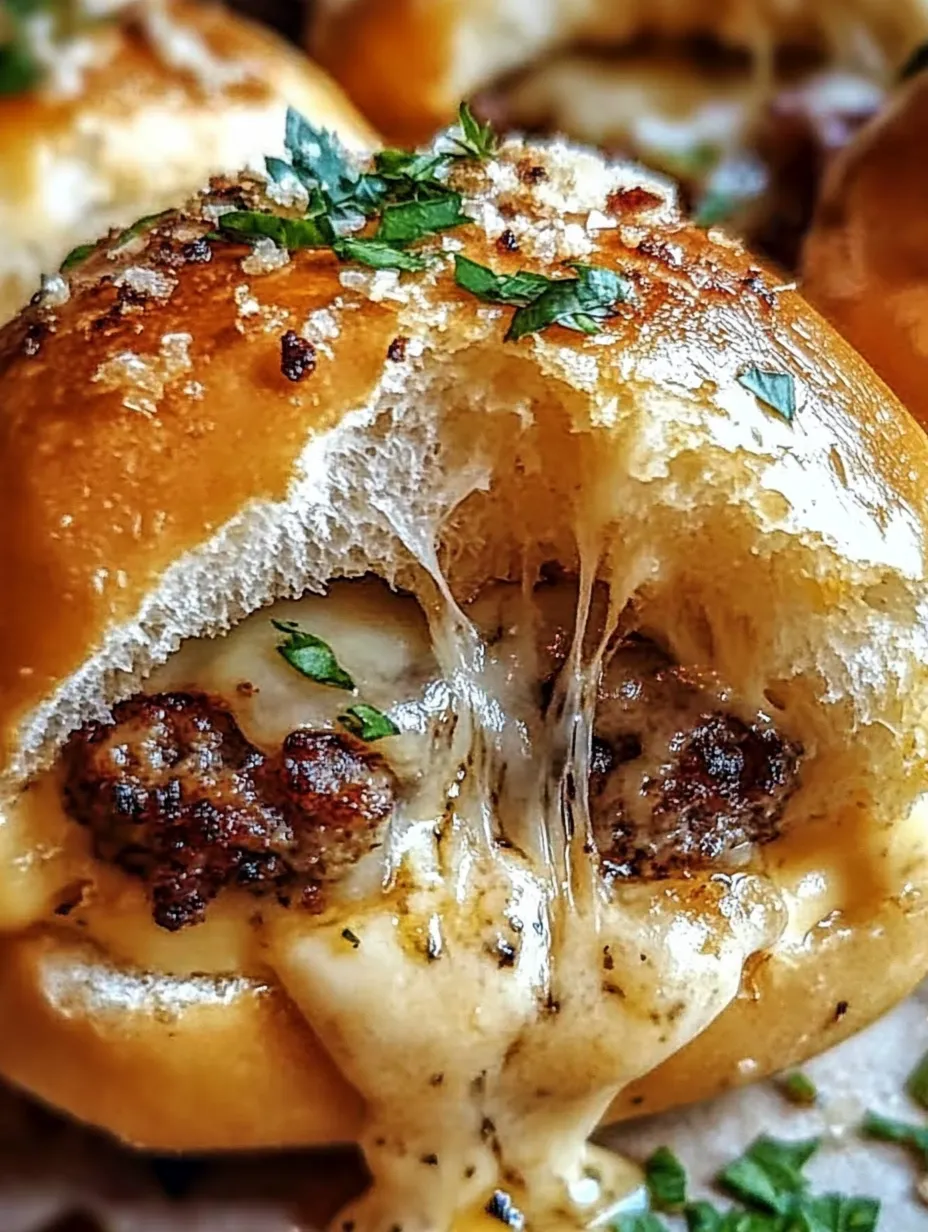
Cheddar is the heart of these bombs The way it turns molten and stretchy inside the warm bread reminds me of when my little cousins would pull them apart just to watch the cheese stretch and ooze My favorite moments are sharing these around the kitchen counter with everyone laughing and sneaking second helpings
Storage Tips
Cool the bombs completely before storing Place them in an airtight container and refrigerate up to four days For longer storage freeze them in a single layer then transfer to a bag or container They reheat beautifully in a toaster oven or a microwave but for the crispiest edges pop them back on a baking tray at three fifty degrees until warmed through
Ingredient Substitutions
- Swap the ground beef for ground turkey or plant based meat for a lighter or vegetarian option
- Try mozzarella or pepper jack if you want to shake up the cheese center
- If you are out of biscuit dough use pizza dough cut into smaller balls for a more rustic texture
Serving Suggestions
Set out with bowls of ranch dipping sauce burger sauce or a spicy garlic aioli These bombs love a side of crispy fries or a simple mixed salad They also shine as a late night snack or centerpiece at a picnic since they travel well and taste great warm or at room temp
Cultural Origin
These are inspired by the all American cheeseburger but borrow the playful spirit of breaded stuffed breads from many cultures like Russian pirozhki or Italian panzerotti The garlic parmesan butter is a nod to classic American Italian flavors that never fail to get attention at any gathering
Frequently Asked Questions
- → What type of dough works best for cheeseburger bombs?
Both refrigerated biscuit dough and pizza dough create a soft, golden crust. Choose your favorite for ease and texture.
- → Can I prepare these bombs ahead of time?
Yes, assemble in advance and refrigerate. Bake fresh when ready to serve for best results.
- → How do I keep the bombs from opening during baking?
Pinch and seal dough edges tightly, then roll each piece gently to form a secure ball before baking.
- → What are some tasty filling add-ins?
Try diced pickles, bacon bits, or substitute pepper jack cheese for extra flavor or heat.
- → What sauces pair well with these bites?
Serve with ranch, burger sauce, spicy ketchup, or garlic aioli for delicious dipping options.
- → Can these be made gluten-free?
Yes, use gluten-free biscuit or pizza dough and check all ingredients for gluten-free labeling.