
 Pin it
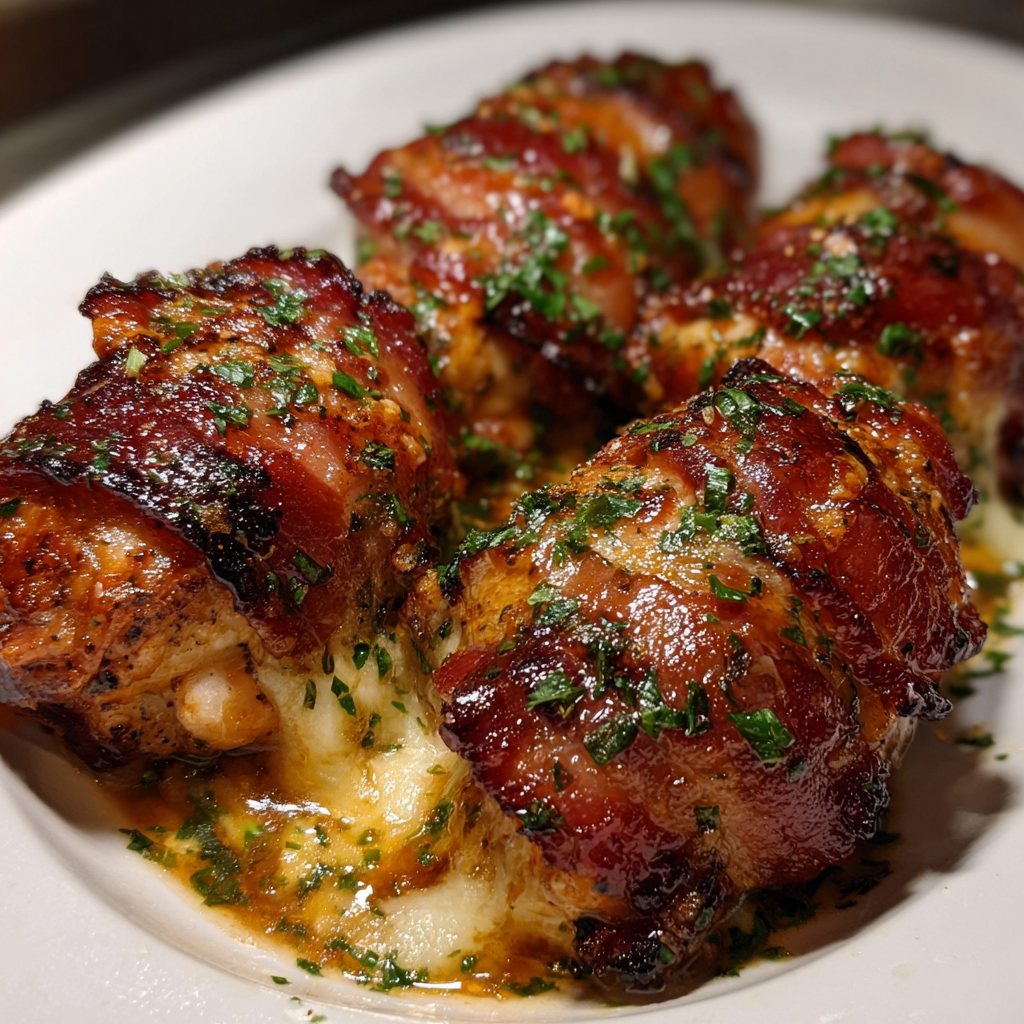
These Cheddar-Stuffed BBQ Bacon Bombs are my secret weapon for any party or game day gathering. They are the ultimate crowd pleaser, delivering an explosion of juicy beef, gooey melted cheddar, and crispy, smoky bacon in every single bite. They look impressive, but are deceptively simple to put together.
I first made a huge batch of these for a championship football game, and they vanished before halftime. Now, I can’t host a get together without my friends asking if the bacon bombs will be making an appearance.
Ingredients
- 1.5 lbs 80/20 ground beef: this fat ratio is key to keeping the meatballs incredibly juicy and flavorful
- 1/2 cup fine dry breadcrumbs: these act as a binder to hold the meatballs together perfectly
- 1 large egg: another essential binder that adds a bit of richness
- 1 tsp salt: the foundation of all flavor don't be shy
- 1/2 tsp black pepper: use freshly ground for the best pop of spice
- 1 tsp garlic powder: adds a deep savory note that complements the beef
- 1 tsp onion powder: provides a subtle sweetness and aromatic base
- 4 oz sharp cheddar cheese: I prefer buying a block and cubing it myself for the best melt
- 12 slices thick cut beef bacon: the thick cut ensures it gets crispy without shrinking too much
- 1/2 cup smoky BBQ sauce: choose your favorite brand a little smokiness or spice works wonders
Step-by-Step Instructions
- Mix the Meatball Base:
- In a large mixing bowl, add the ground beef, breadcrumbs, egg, salt, black pepper, garlic powder, and onion powder. Gently mix everything together with your hands. Be careful not to overwork the meat, as that can make it tough. Just mix until all the ingredients are evenly distributed and the mixture feels uniform.
- Stuff and Seal the Bombs:
- Pinch off a portion of the meat mixture, about the size of a golf ball, and flatten it into a small patty in the palm of your hand. Place a cube of your sharp cheddar cheese right in the center. Carefully fold the meat up and around the cheese, rolling it gently between your palms to form a smooth ball. The most important part here is to make sure the cheese is completely sealed inside so none of that golden goodness escapes during baking.
- Wrap with Bacon:
- Take one slice of thick cut beef bacon and gently stretch it just a little. Snugly wrap it around one of the meatballs, making sure the entire surface is covered. Tuck the ends of the bacon slice securely on the bottom of the meatball. This helps it stay in place as it cooks.
- Glaze and Bake to Perfection:
- Arrange the bacon wrapped bombs seam side down on a baking sheet lined with parchment paper for easy cleanup. Brush a light layer of your BBQ sauce over the top and sides of each one. Place them in a preheated 375°F oven and bake for 25 to 30 minutes. About halfway through the cooking time, pull them out and brush with another generous layer of BBQ sauce. They're done when the bacon is beautifully crispy and an instant read thermometer inserted into the meat part registers 160°F.
- Let Them Rest:
- This step is crucial. Let the bombs rest on the baking sheet for at least five minutes after you take them out of the oven. This allows the juices in the meat to redistribute and gives the molten cheese inside a moment to set up, so it doesn’t all spill out on the first bite.
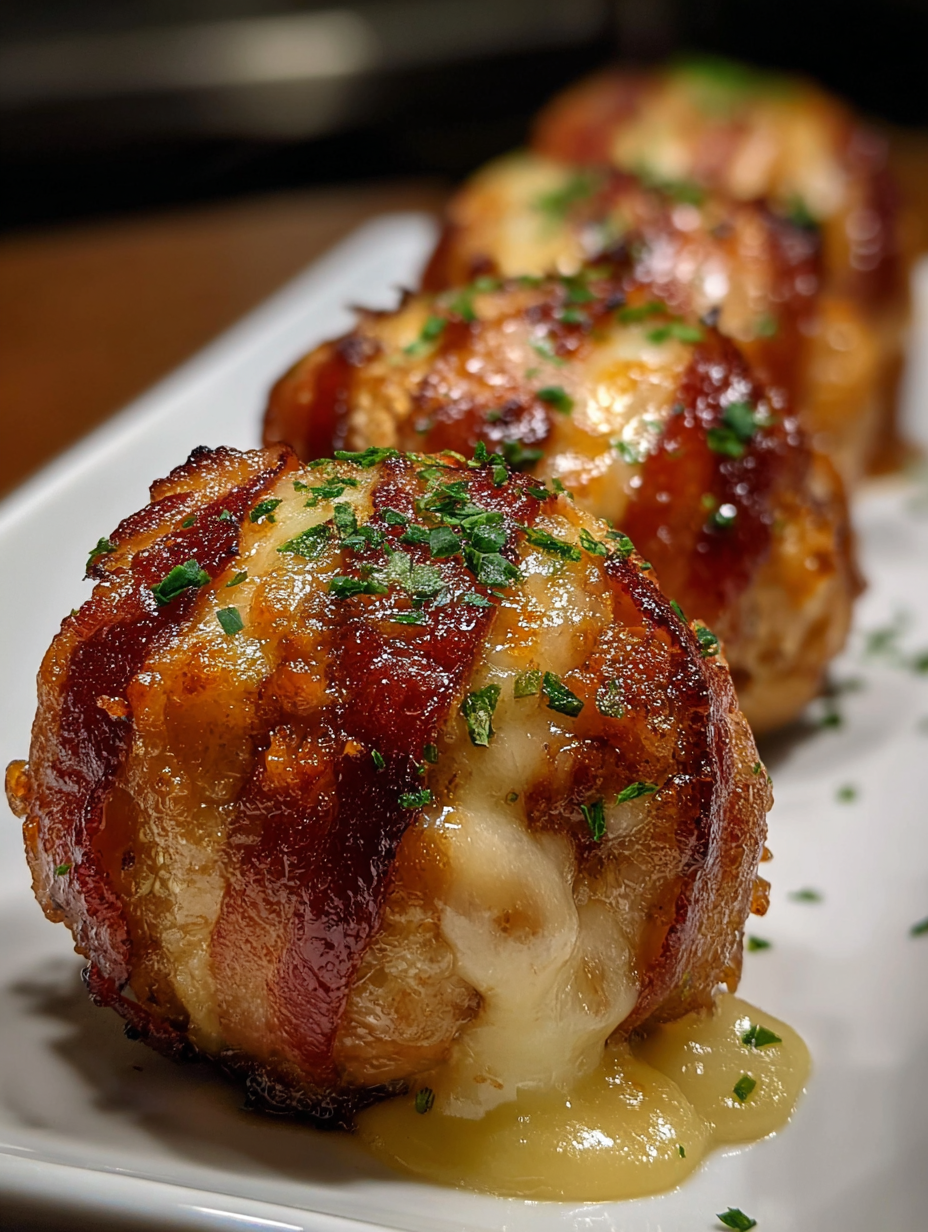
My favorite part of this whole recipe is the cheese. Using a good, sharp cheddar is non negotiable for me. It has a tangy flavor that cuts right through the richness of the beef and bacon. Watching my family’s eyes light up when they bite into one and get that glorious cheese pull is the best reward.
Storage and Reheating Tips
If you have any leftovers, they store wonderfully. Let them cool completely before placing them in an airtight container in the refrigerator for up to three days. To reheat, I highly recommend skipping the microwave. Pop them back into an oven or an air fryer at 350°F for about 10 minutes, or until they are heated through and the bacon is crisp again.
Easy Ingredient Swaps
Don't be afraid to make this recipe your own. You can easily swap the sharp cheddar for pepper jack to add a spicy kick, or mozzarella for an extra stringy cheese pull. If you're not a fan of beef, ground turkey or even ground chicken work well as a substitute. Just be sure to use a variety that isn't too lean to keep it from drying out. Pork bacon or turkey bacon are also fantastic alternatives to the beef bacon.
Serving Suggestions
These bacon bombs are the star of any platter. I like to serve them warm with toothpicks for easy grabbing. They are fantastic on their own, but also great with a side of extra BBQ sauce or even ranch dressing for dipping. To turn them into a mini meal, tuck one or two into a slider bun with some crisp lettuce and a slice of tomato. They also pair wonderfully with classic cookout sides like coleslaw or potato wedges.
Frequently Asked Questions
- → What kind of cheese works best in these bombs?
Sharp cheddar is classic, but pepper jack or mozzarella are delicious alternatives! Experiment to find your favorite gooey center.
- → Can I use ground turkey or chicken instead of beef?
Absolutely! Ground turkey or chicken can be substituted for a lighter option. Adjust cooking time as needed to ensure they're cooked through.
- → What's the best way to keep the cheese from melting out?
Make sure to tightly seal the meat around the cheese, ensuring there are no cracks or gaps. Resting the bombs for a few minutes after baking also helps.
- → Can I prepare these bacon bombs ahead of time?
Yes! You can form the bombs and refrigerate them, unbaked, for up to 24 hours. Add the BBQ sauce just before baking.
- → What are some good serving suggestions?
Serve them hot with extra BBQ sauce for dipping. They're also great on slider buns with lettuce and tomato, or alongside coleslaw, potato wedges, pickles, or jalapeños.
- → How should I store leftovers?
Store leftovers in an airtight container in the refrigerator for up to 3 days. Reheat in the oven, air fryer, or microwave.