
 Pin it
I've been making traditional cinnamon rolls for years, but when I discovered this braided version last winter, it completely changed my baking game! These twisted beauties look fancy enough for a special occasion but honestly aren't much harder than regular cinnamon rolls once you get the hang of the braiding technique.
My sister-in-law asked me to teach her how to make these after I brought them to a family brunch, and now it's become our holiday tradition to make them together the night before Christmas.
What You'll Need
- Yeast dough: The foundation of great cinnamon rolls is a soft, enriched dough. This recipe uses milk, butter and eggs for the perfect texture.
- Cinnamon filling: The classic combo of butter, brown sugar, and cinnamon creates that gooey, spiced center we all crave.
- Patience: The multiple rising times might seem annoying, but they're essential for that perfect texture.
- Clean workspace: Having enough counter space for braiding makes the process much easier.

How I Make Them
Perfecting The DoughI've found that the temperature of ingredients matters so much for this dough. Using room temperature eggs and warm (not hot) milk helps the yeast activate properly. The dough should feel silky and pull away from the bowl cleanly - if it's still sticking, I add a tablespoon of flour at a time until it reaches that perfect consistency.
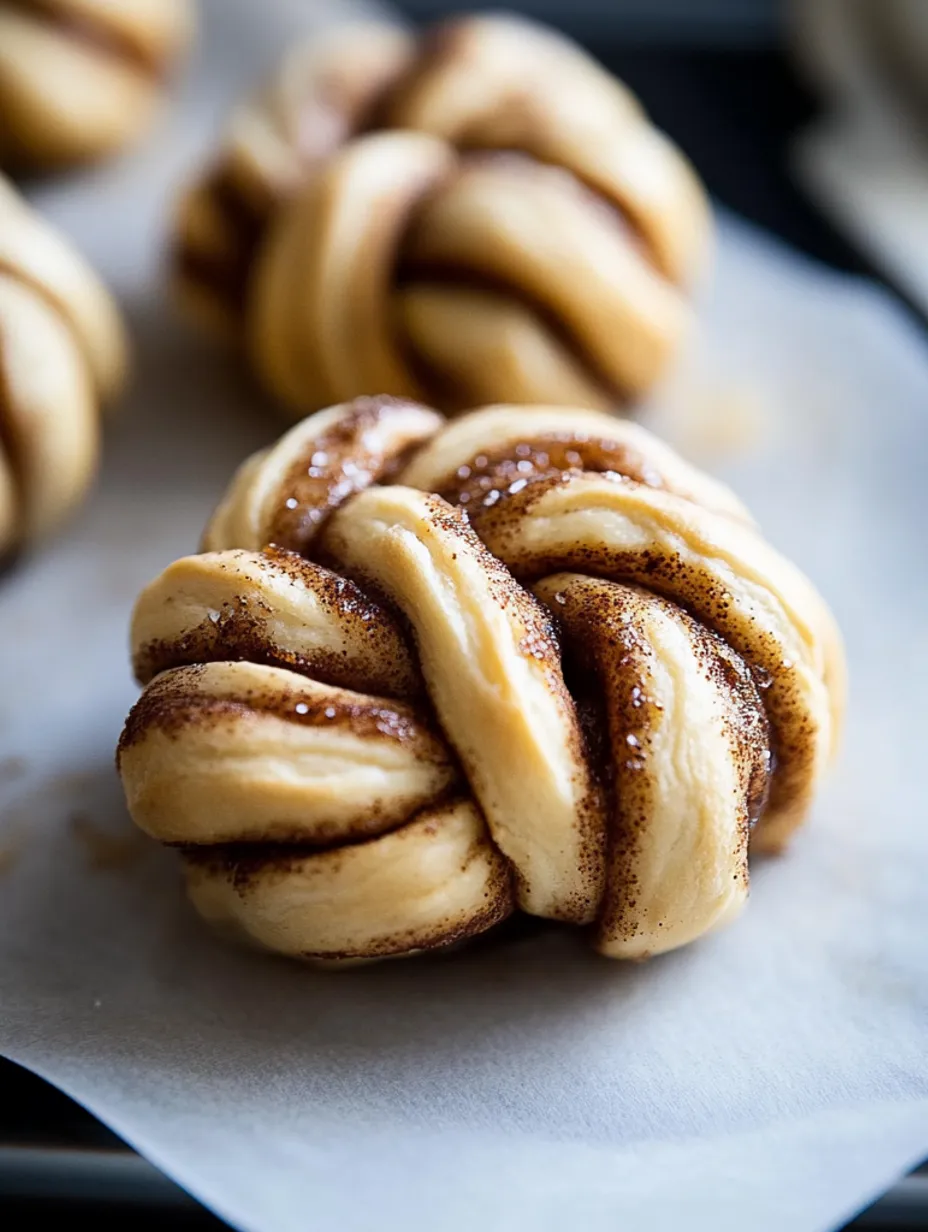
Layering The FillingRather than just spreading filling on one side like regular cinnamon rolls, the way you layer and fold the dough with filling creates these beautiful ripples of cinnamon throughout. I make sure to spread the filling evenly all the way to the edges for the best distribution.
Braiding MagicThis was intimidating the first time, but after doing it once, I realized it's not complicated - just different! Cutting the strips with a sharp knife (rather than a pizza cutter) gives cleaner edges. If the dough starts to warm up and get sticky during this process, a quick 5-minute rest in the refrigerator firms everything back up.
Second Rise PatienceIt's so tempting to skip the second rise, but this is where the magic happens. The braided buns nearly double in size and become incredibly soft and fluffy. I cover them with a lightweight kitchen towel to prevent them from drying out.
I learned to make these from my grandmother's Swedish neighbor who called them "kanelbullar," though her version was shaped slightly differently. The first time I tried making them myself, I accidentally rolled them too tight, which prevented them from rising properly in the center. Now I keep them a bit looser when coiling, and they puff up beautifully.
Serving Ideas
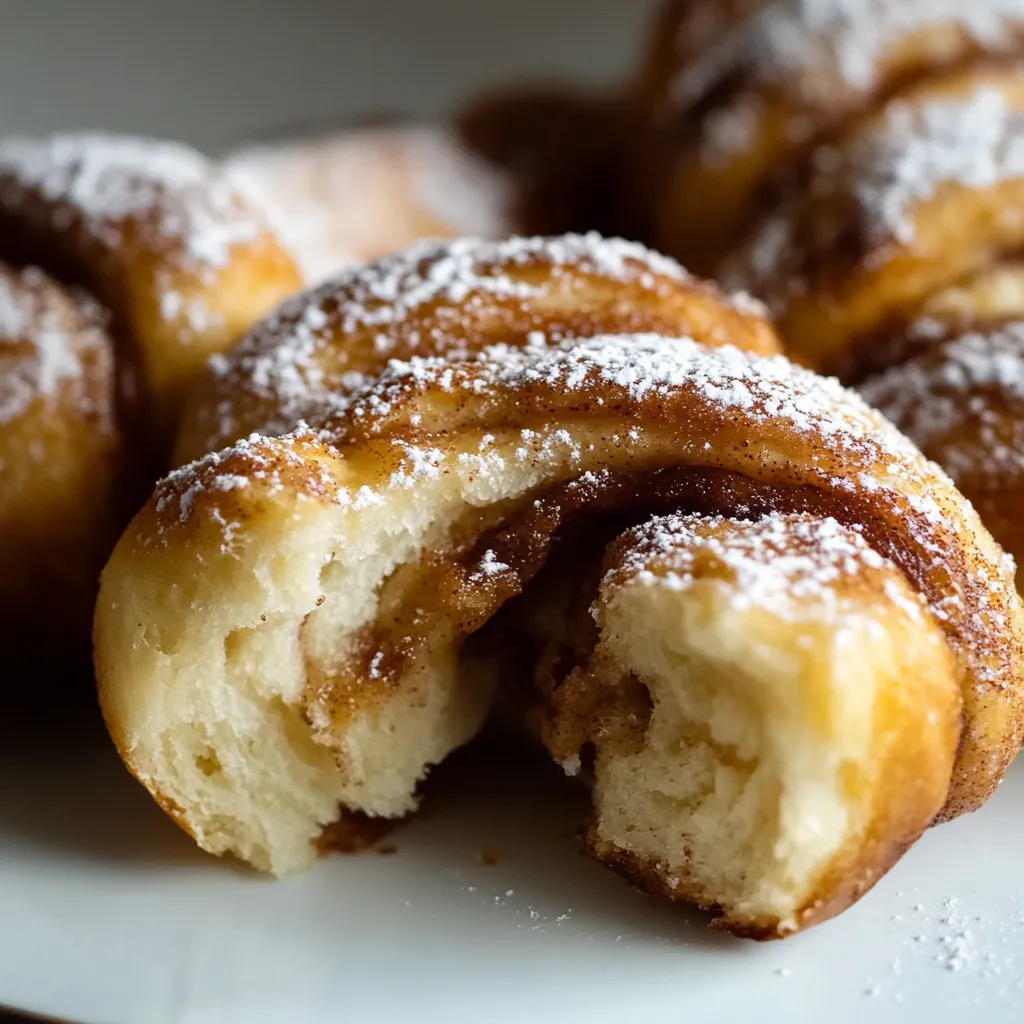
These are gorgeous served just as they are with a light dusting of powdered sugar that highlights the braiding. For brunch, I arrange them on a wooden board with fresh berries scattered around. They pair beautifully with coffee, especially something with nutty notes that complements the cinnamon.
Make It Your Own
Try adding orange zest to the filling for a citrusy twist. Cardamom in the dough gives them a Scandinavian flair. For extra decadence, drizzle with a simple glaze of powdered sugar and cream instead of frosting - just enough to add sweetness without hiding the beautiful pattern. During the holidays, I sometimes add chopped pecans to the filling for crunch.
Practical Storage
These are best the day they're made, but will keep for about 2 days in an airtight container. To refresh them, wrap loosely in foil and warm in a 300°F oven for 5-7 minutes. They also freeze surprisingly well - I freeze them individually wrapped, then thaw overnight in the refrigerator and warm before serving.
Pro Tips
- Use a ruler to measure when cutting strips for the most even-sized buns
- Don't rush the rising time - that's what makes them so soft and fluffy
- If you want them extra gooey, double the filling
- For morning baking, you can do the first rise overnight in the refrigerator
There's something so satisfying about the process of making these braided cinnamon buns - from watching the dough rise to creating those beautiful braids. The result is not just delicious but genuinely impressive-looking, which makes them perfect for those times when you want to show a little extra love through baking.
Frequently Asked Questions
- → Can I make the dough the night before?
- Yes, you can prepare the dough and refrigerate it overnight for the first rise. Let it come to room temperature for about 30 minutes before rolling and filling.
- → What if I don't have a stand mixer?
- You can mix everything in a large bowl with a wooden spoon until a shaggy dough forms, then knead by hand on a floured surface for 8-10 minutes until smooth.
- → Can I freeze these cinnamon buns?
- Yes, you can freeze them either before or after baking. For unbaked buns, freeze after shaping and before the second rise. For baked buns, cool completely first.
- → Why is my dough too sticky?
- Dough can be sticky depending on humidity and how flour is measured. Add a tablespoon of flour at a time during kneading until it's soft but workable.
- → Can I add nuts or raisins to the filling?
- Absolutely! Add 1/2 cup of chopped nuts or raisins to the filling mixture for extra texture and flavor.